Keep Your Desktop Window in Sight: Top 5 Methods for Ensuring Applications Stay On Top of Others on PC

Keep Your Desktop Window in Sight: Top 5 Methods for Ensuring Applications Stay On Top of Others on PC
Quick Links
- The Official Way: Microsoft PowerToys
- With a Keyboard Shortcut: AutoHotkey
- Using a Mouse: DeskPins
- Without Installing Anything Extra: Built-in App Options
Key Takeaways
- To make a window always on top, install Microsoft PowerToys and press Windows+Ctrl+T. You can customize this keyboard shortcut in PowerToys Settings.
- Consider third-party utilities like AutoHotkey and DeskPins if you want something that works in a slightly different way.
- You can also use built-in options in applications like the Task Manager or VLC player.
Microsoft offers an official tool to keep any window always-on-top of other windows on Windows 10 or Windows 11. We can also recommend some awesome third-party tools for making any window always on top—and many applications have a hidden option for this.
The Official Way: Microsoft PowerToys
We recommend Microsoft PowerToys for keeping a window always on top. Microsoft PowerToys is a free, open-source package full of powerful Windows utilities developed by Microsoft. The Always-on-Top PowerToy provides an easy, convenient, official way of making any window always on top, and it works on both Windows 10 and Windows 11.
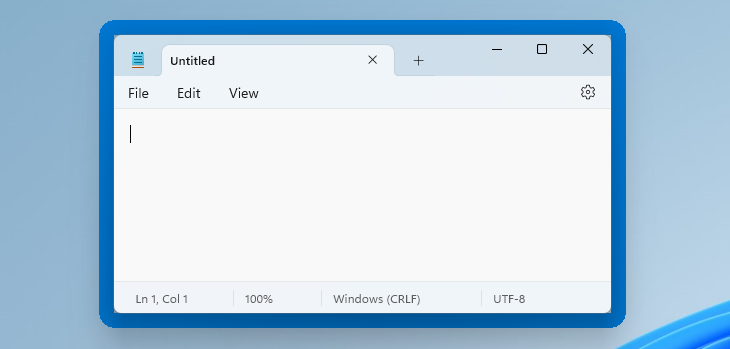
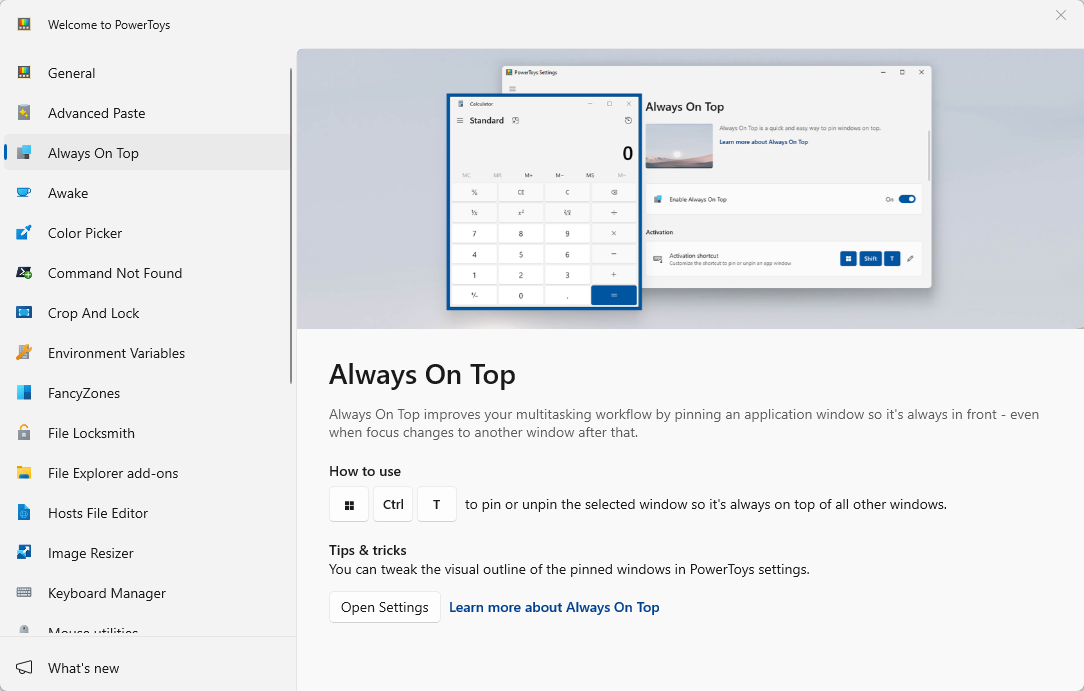
To make a window always on top, install and launch Microsoft PowerToys . Press Windows+Ctrl+T to make the current window always on top. A blue border will appear on the window, and a sound will play. Press Windows+Ctrl+T to undo your change and make Windows treat the window normally.

You can customize this behavior by launching the PowerToys Settings window. To do so, launch “PowerToys” from the Windows Start menu or click the PowerToys icon in your taskbar’s notification area and click the gear-shaped Settings icon.
Select “Always on Top” in the sidebar. If the keyboard shortcut didn’t work, ensure the “Always on Top” PowerToy is enabled at the top here. You can use the options here to change the keyboard shortcut, control whether a colored border appears around the window and customize that border, choose whether the sound plays, and configure windows that will never be made always on top.

We’re big fans of Microsoft PowerToys. The package is full of other useful utilities , and there’s a good chance you’ll find something else useful in it, too.
We recommend the Microsoft PowerToys method as our top choice. You can disable other PowerToys in the PowerToys Settings window if you don’t like the clutter. However, we cover a variety of other simple utilities and methods for making a window always-on-top below.
With a Keyboard Shortcut: AutoHotkey
Using the excellent and useful AutoHotkey program , you can make a simple script that sets your currently active window to be always on top when you press a certain key combination. The resulting script is lightweight and won’t use much resources or add unnecessary clutter to your system. You can even use AutoHotkey to compile the script to its own executable if you don’t want to keep the full AutoHotkey program running—or if you want an easy way to carry the script with you to other PCs.
First, you’ll need download and install AutoHotkey .
When that’s done, you’ll need to create a new script (if you already use AutoHotkey, feel free to add this to a current script or create a new one). To create a new script, right-click anywhere on your desktop or in a File Explorer window, point to the “New” menu, and then select the “AutoHotkey Script” option.

Give the new script file whatever name you want, click then click “Edit.” When prompted, open the script in Notepad.

In the Notepad window, paste the following line of code at the bottom. You can then save and close the script.
`^space::
WinSetAlwaysOnTop -1, “A”
}`

Next, double-click your script to run it. You’ll know it’s running because a green “H” logo appears in your system tray to let you know it’s running as a background process.

You can now press Ctrl+Space to set any currently active window to be always on top. Press Ctrl+Space again set the window to no longer be always on top.
And if you don’t like the Ctrl+Space combination, you can change the ^SPACE part of the script to set a new keyboard shortcut. Consult the Hotkeys documentation on AutoHotkey’s website for help.
Using a Mouse: DeskPins
If you prefer using a mouse over keyboard shortcuts, DeskPins provides a super simple way to make windows always on top by just pinning them.
First, you’ll need to download and install DeskPins . After installation, go ahead and run DeskPins. You’ll see that it adds a pin icon to your system tray.

When you have a window you want to pin to be always on top, click that system tray icon. Your pointer turns into a pin, and you can then click any window to pin it so that it’s always on top. Pinned windows actually have a red pin added to the title bar, so that you can tell easily which windows are pinned and which are not.

To remove a pin from a window, move your mouse over the pin. Your pointer will show a small “X” on it to let you know you’re about to remove the pin. And if you want to remove pins from all windows you’ve pinned at once, right-click the system tray icon, and then choose the “Remove All Pins” option.
Without Installing Anything Extra: Built-in App Options
Many apps have built-in options so that you can set their windows to become always on top. You often find these options in media players, system utilities, and other tools that you might want to see all the time. Programs that accept plug-ins may also have an always-on-top plugin you can install.
The Windows Task Manager is one built-in application that has this option on Windows 10 and Windows 11, for example. To make the Task Manager always-on-top on Windows 10 , click Options > Always on Top in the Task Manager window. (If you don’t see the Options menu at the top of the window, click “More details” at the bottom.)
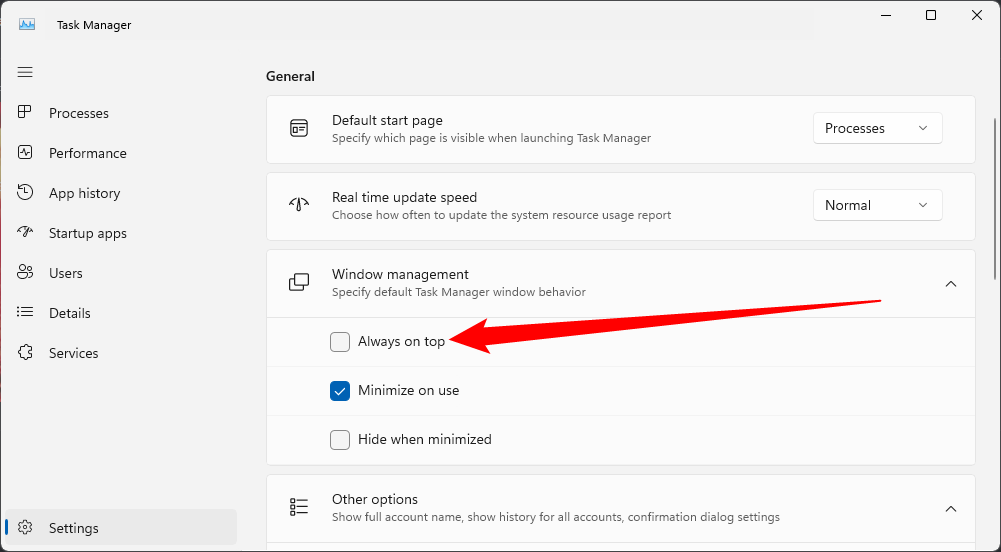
To make the Task Manager always-on-top on Windows 11 , open the Task Manager’s menu, select “Settings,” and check “Always on top” under Window management. The Task Manager will remember this setting for the future.

Here’s how to enable the built-in always-on-top option in some other popular programs:
- VLC: Click Video > Always on top.
- Process Explorer: Click Options > Always on Top.
In addition to these apps, some bigger, more fully-featured window and desktop utilities also offer the ability to make windows always on top. DisplayFusion , for example, offers the feature (even in its free version), but also provides tools for managing multiple monitors, controlling the desktop and windows in all kinds of ways, and even tweaking other Windows settings. Actual Window Manager offers the feature, too, and also adds over 50 other desktop management tools. If you already use one of those—or are interested in those other features—then by all means give them a try.
Also read:
- [New] In 2024, Extensive Appraisal Hero4 Black Capabilities
- [New] Mirth in Monotony The Top 20 Fb Detention Reprieve Humor for 2024
- [Updated] Expert Picks Top 9 Video Chat & Conference Apps iOS/Android for 2024
- [Updated] Fashion Meets Makeup Brilliance for 2024
- [Updated] Frontline Contenders Top 7 Action FPS Games for 2024
- 2024 Approved Searching for Free Sports Streaming Sites? Look No Further
- Alien: Fireteam Elite on PC Now Stable After Fixing Frequent Failures
- Education and Support
- How to Overcome Developer Bug 5573 in Call of Duty: Vanguard Gameplay
- How to Stop 'Modern Warfare 2' From Crashing on Your Computer: A Comprehensive Guide
- How to Unlock Infinix Smart 8 HD Pattern Lock if Forgotten? 6 Ways
- Mastering Arcadegeddon on PC: How to Prevent Unwanted Game Shutdowns
- New The Ultimate Guide to Slow Motion Video Editing with Windows Live Movie Maker
- Professional Picture Taking Within Microsoft Teams
- Resolved! How to Stop Serious Sam 4 From Freezing and Hiccuping During Playtime
- Secrets Unveiled: Stealthily Protect Your ChatGPT Dialogues From Prying Eyes
- Start by Incorporating More Plant-Based Meals Into Your Week and See How You Feel with These Changes.
- Troubleshooting Guide: Overcoming the 'Black Screen' Problem with Epic Games Launcher
- Troubleshooting Steps to Start 'Last Epoch' Successfully on Your PC - Latest Solutions
- Title: Keep Your Desktop Window in Sight: Top 5 Methods for Ensuring Applications Stay On Top of Others on PC
- Author: Christopher
- Created at : 2024-12-11 19:18:28
- Updated at : 2024-12-12 17:29:47
- Link: https://win-blog.techidaily.com/keep-your-desktop-window-in-sight-top-5-methods-for-ensuring-applications-stay-on-top-of-others-on-pc/
- License: This work is licensed under CC BY-NC-SA 4.0.
