
Mastering Data Retrieval From Office Docs: Images, Text, & File Extraction Techniques

Mastering Data Retrieval From Office Docs: Images, Text, & File Extraction Techniques
Say someone sent you a Word document with a lot of images, and you want you to save those images on your hard drive. You can extract images from a Microsoft Office document with a simple trick.
If you have a Word (.docx), Excel (.xlsx), or PowerPoint (.pptx) file with images or other files embedded, you can extract them (as well as the document’s text), without having to save each one separately. And best of all, you don’t need any extra software. The Office XML based file formats–docx, xlsx, and pptx–are actually compressed archives that you can open like any normal .zip file with Windows. From there, you can extract images, text, and other embedded files. You can use Windows’ built-in .zip support, or an app like 7-Zip if you prefer.
If you need to extract files from an older office document–like a .doc, .xls, or .ppt file–you can do so with a small piece of free software. We’ll detail that process at the end of this guide.
How to Extract the Contents of a Newer Office File (.docx, .xlsx, or .pptx)
To access the inner contents of an XML based Office document, open File Explorer (or Windows Explorer in Windows 7), navigate to the file from which you want to extract the content, and select the file.
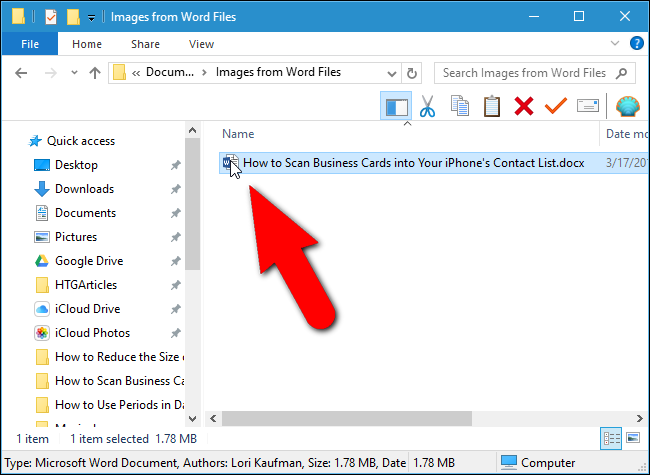
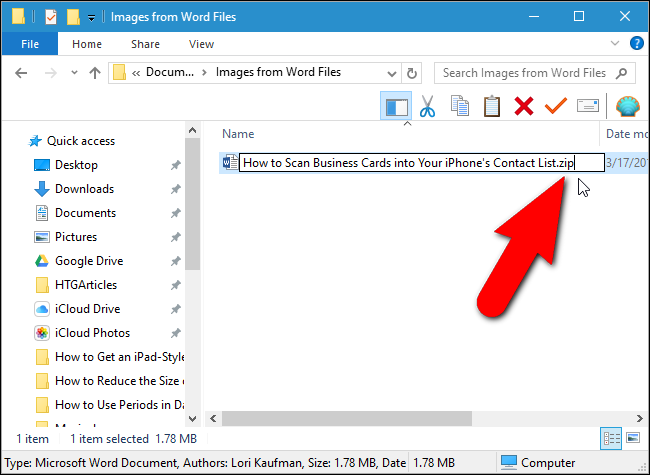
Press “F2” to rename the file and change the extension (.docx, .xlsx, or .pptx) to “.zip”. Leave the main part of the filename alone. Press “Enter” when you’re done.
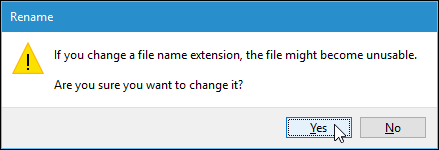
The following dialog box displays warning you about changing the file name extension. Click “Yes”.
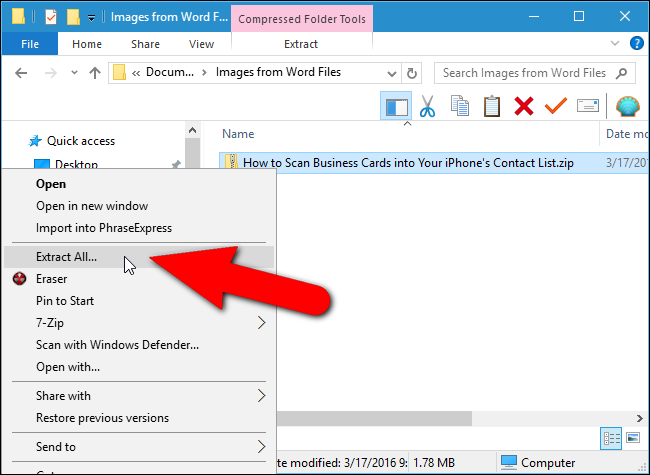
Windows automatically recognizes the file as a zipped file. To extract the contents of the file, right-click on the file and select “Extract All” from the popup menu.
On the “Select a Destination and Extract Files” dialog box, the path where the content of the .zip file will be extracted displays in the “Files will be extracted to this folder” edit box. By default, a folder with the same name as the name of the file (without the file extension) is created in the same folder as the .zip file. To extract the files to a different folder, click “Browse”.
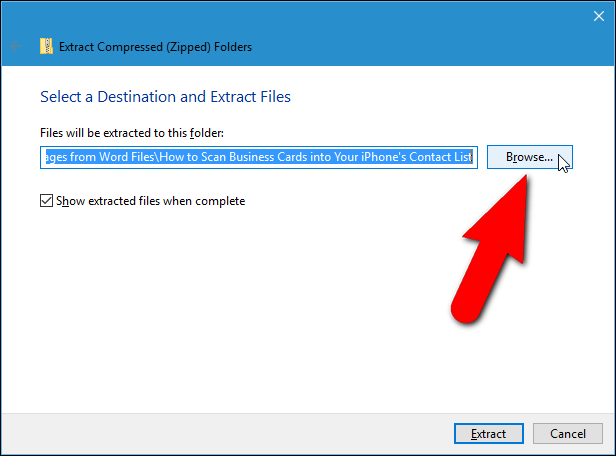
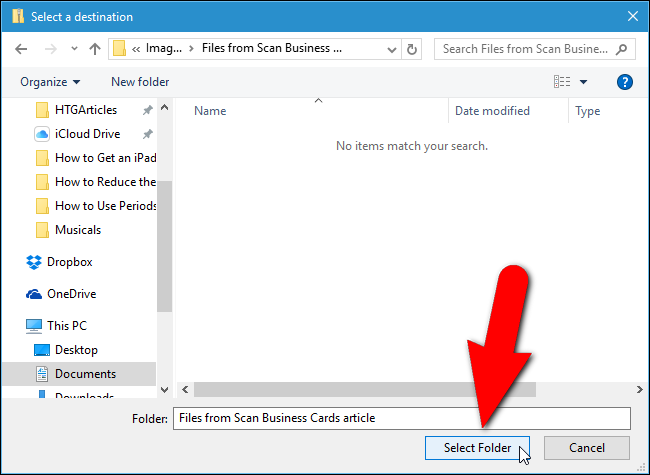
Navigate to where you want the content of the .zip file extracted, clicking “New folder” to create a new folder, if necessary. Click “Select Folder”.
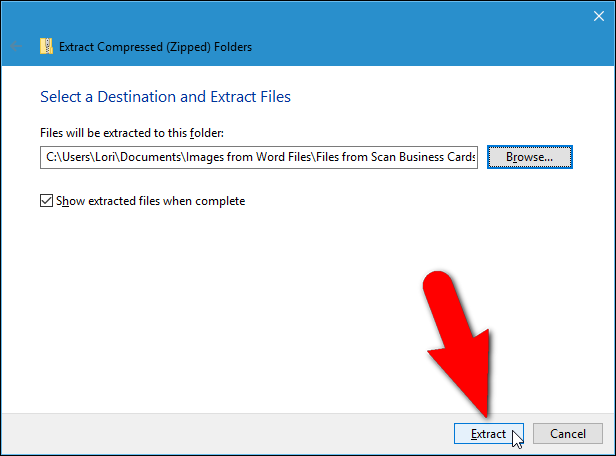
To open a File Explorer (or Windows Explorer) window with the folder containing the extracted files showing once they are extracted, select the “Show extracted files when complete” check box so there is a check mark in the box. Click “Extract”.
How to Access the Extracted Images
Included in the extracted contents is a folder named “word”, if your original file is a Word document (or “xl” for an Excel document or “ppt” for a PowerPoint document). Double-click on the “word” folder to open it.
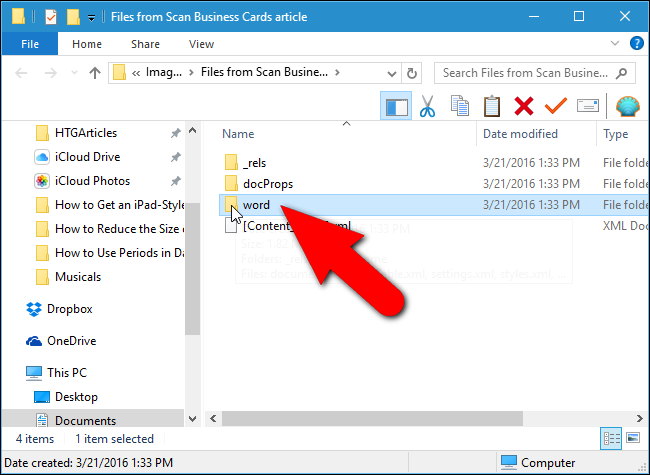
Double-click the “media” folder.
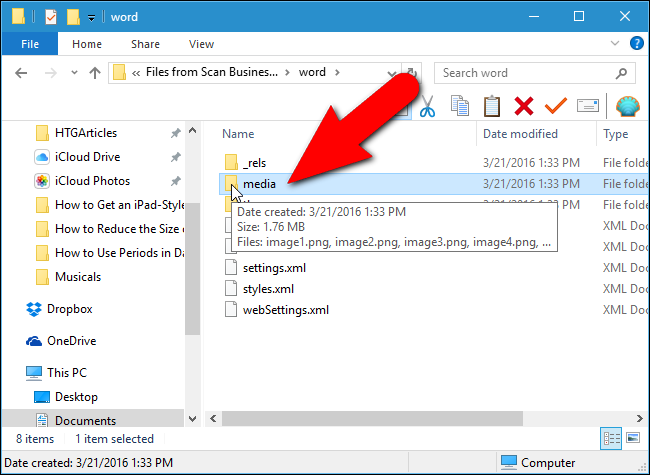
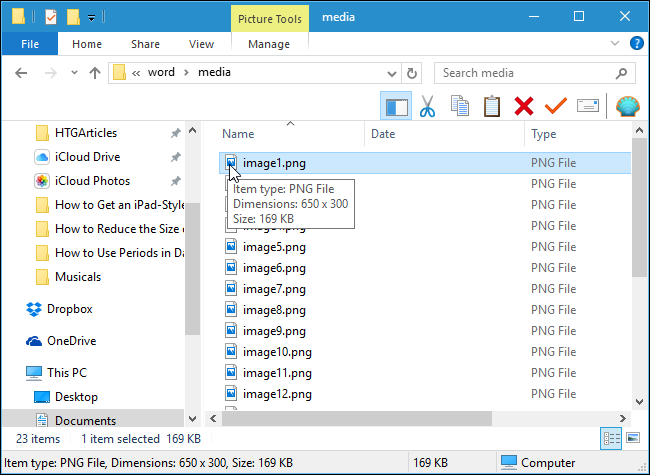
All the images from the original file are in the “media” folder. The extracted files are the original images used by the document. Inside the document, there may be resizing or other properties set, but the extracted files are the raw images without these properties applied.
How to Access the Extracted Text
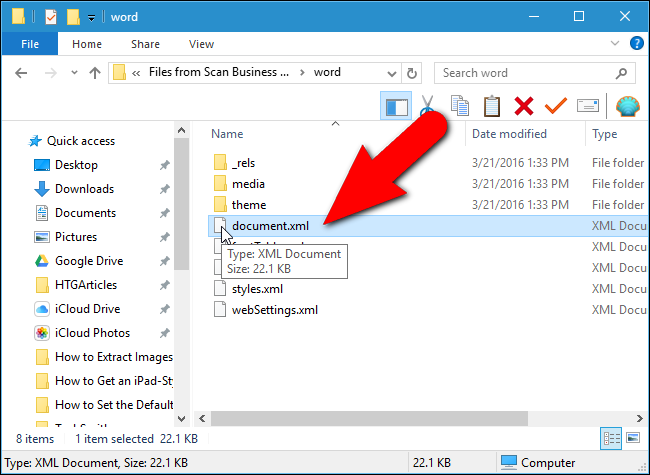
If you don’t have Office installed on your PC, and you need to extract text out of a Word (or Excel or PowerPoint) file, you can access the extracted text in the “document.xml” file in the “word” folder.
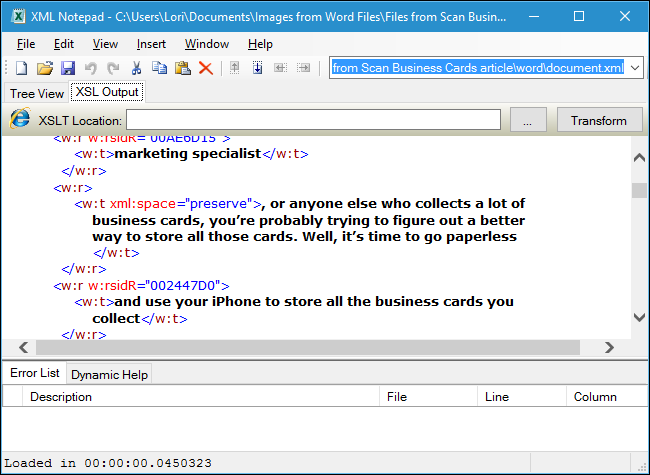
You can open this file in a text editor, such as Notepad or WordPad, but it’s easier to read in a special XML editor, such as the free program, XML Notepad . All the text from the file is available in chunks of plain text regardless of the style and/or formatting applied in the document itself. Of course, if you’re going to download free software to view this text, you might as well download LibreOffice , which can read Microsoft Office documents.
How to Extract Embedded OLE Objects or Attached Files
To access embedded files in a Word document when you don’t have access to Word, first open the Word file in WordPad (which comes built into Windows). You might notice that some of the embedded file icons do not display, but they’re still there. Some of the embedded files might have partial filenames. WordPad does not support all of Word’s features, so some content might be displayed improperly. But you should be able to access the files.
If we right-click on one of the embedded files in our sample Word file, one of the options is “Open PDF Object”. This opens the PDF file in the default PDF reader program on your PC. From there, you can save the PDF file to your hard drive.
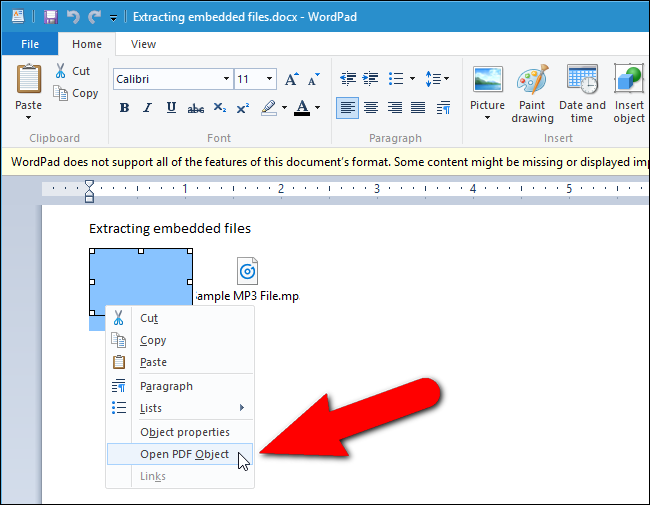
If WordPad doesn’t have an option for opening your file, make note of its file type here. For example, our second file in this document is a .mp3 file.
Then, go back to your “Files from [Document]“ folder and double-click the “embeddings” folder inside the “word” folder.
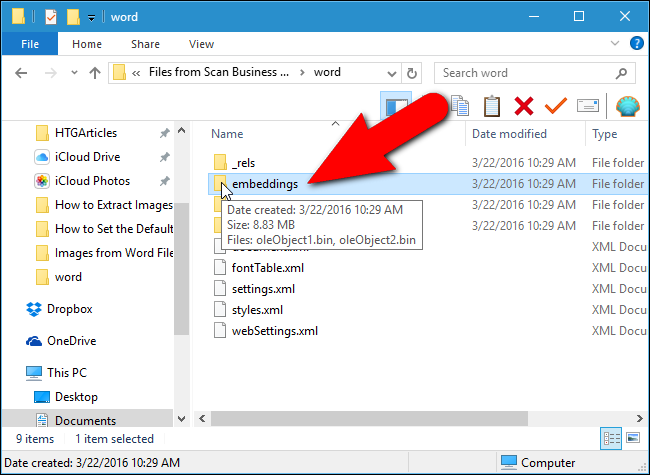
Unfortunately, the file types are not preserved in the filenames. They all have a “.bin” file extension instead. If you know what types of files are embedded in the file, you can probably deduce which file is which by the size of the file. In our example, we had a PDF file and an MP3 file embedded in our document. Because the MP3 file is most likely larger than the PDF file, we can figure out which file is which by looking at the sizes of the files and then rename them using the correct extensions. Below, we’re renaming the MP3 file.
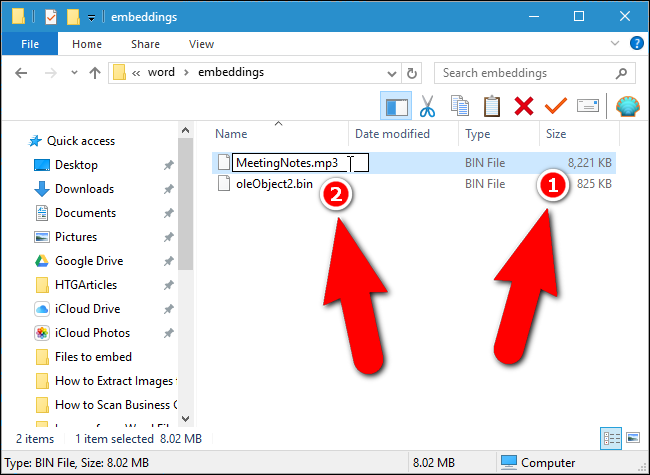
Note that not all files will necessarily open using this process–for example, our PDF file opened correctly from WordPad, but we couldn’t get it to open by renaming its .bin file.
Once you’ve extracted the content of the zipped file, you can revert the extension of the original file back to .docx, .xlsx, or .pptx. The file will remain intact and can be opened normally in the corresponding program.
How to Extract Images from Older Office Documents (.doc, .xls, or .ppt)
If you need to extract images from an Office 2003 (or earlier) document, there’s a free tool called Office Image Extraction Wizard that makes this task easy. This program also allows you to extract images from multiple documents (of the same or different types) at once. Download the program and install it (there’s also a portable version available if you’d rather not install it).
Run the program, and the Welcome screen displays. Click “Next”.
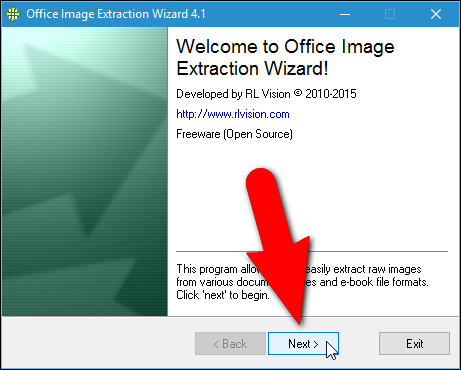
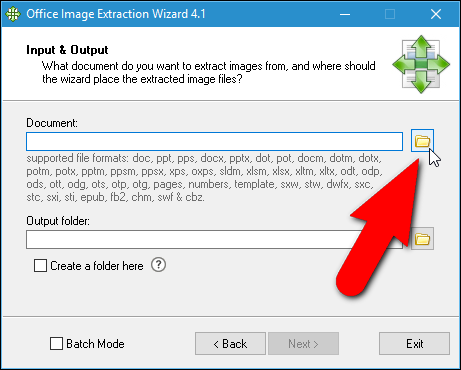
First, we need to select the file from which you want to extract the images. On the Input & Output screen, click the “Browse” (folder icon) button to the right of the Document edit box.
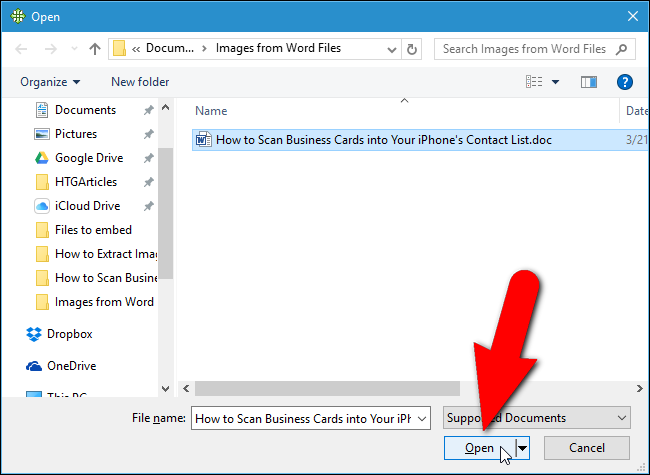
Navigate to the folder containing the document you want, select it, and click “Open”.
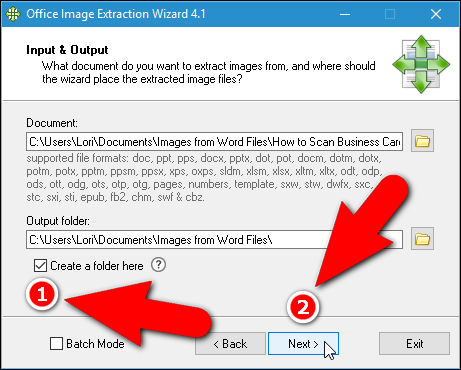
The folder that contains the selected file automatically becomes the Output folder. To create a subfolder within that folder named the same as the selected file, click the “Create a folder here” check box so there is a check mark in the box. Then, click “Next”.
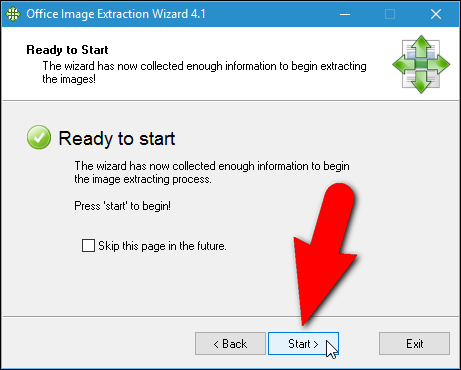
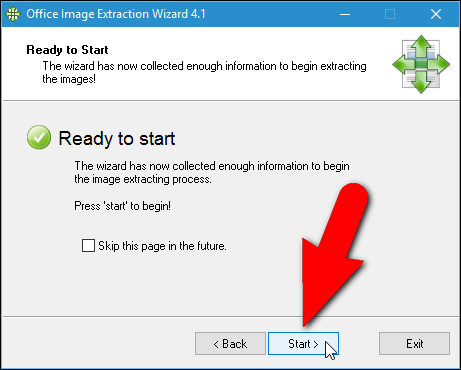
On the Ready to Start screen, click “Start” to begin extracting the images.
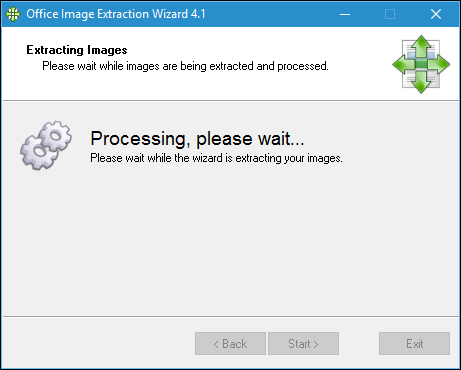
The following screen displays while the extraction processes.
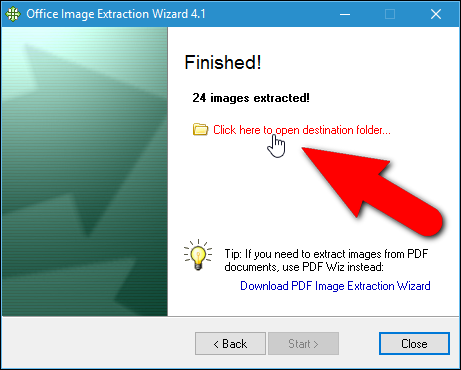
On the Finished screen, click the “Click here to open destination folder” to view the resulting image files.
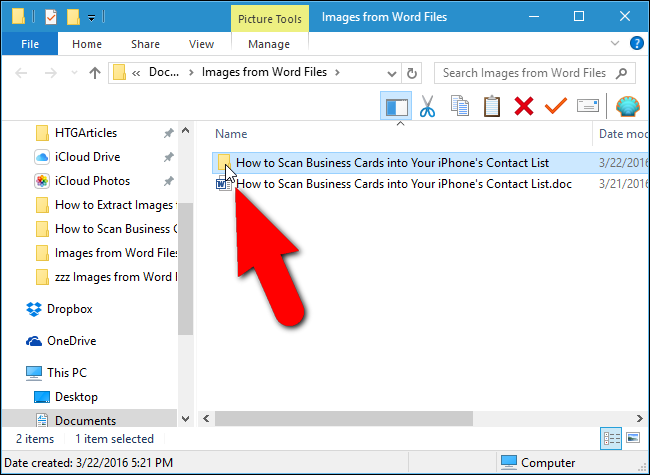
Because we chose to create a subfolder, we get a folder containing the image files extracted from the file.
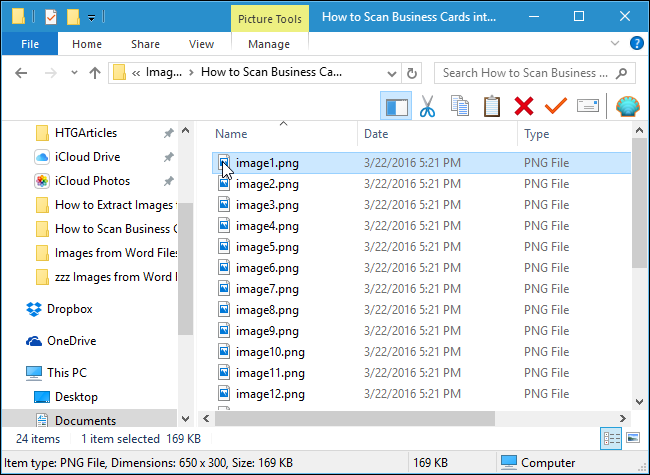
You will see all the images as numbered files.
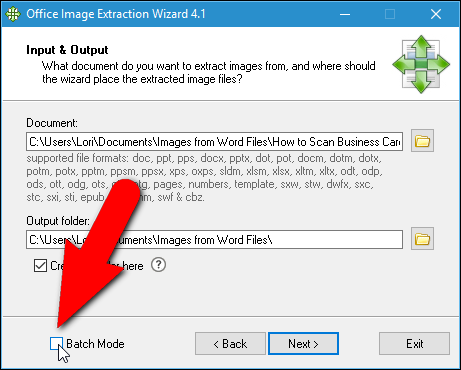
You can also extract images from multiple files at once. To do this, on the Input & Output screen, click the “Batch Mode” check box so there is a check mark in the box.
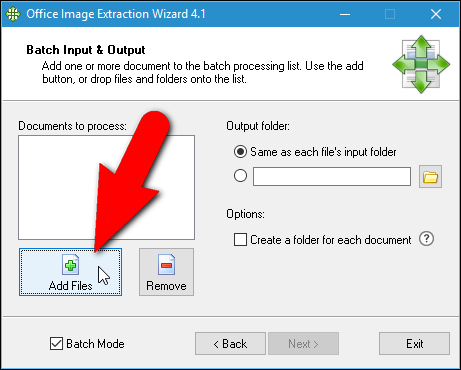
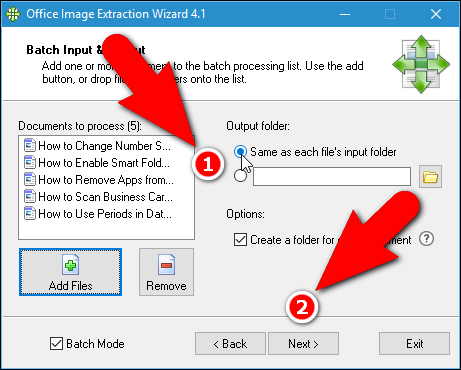
The Batch Input & Output screen displays. Click “Add Files”.
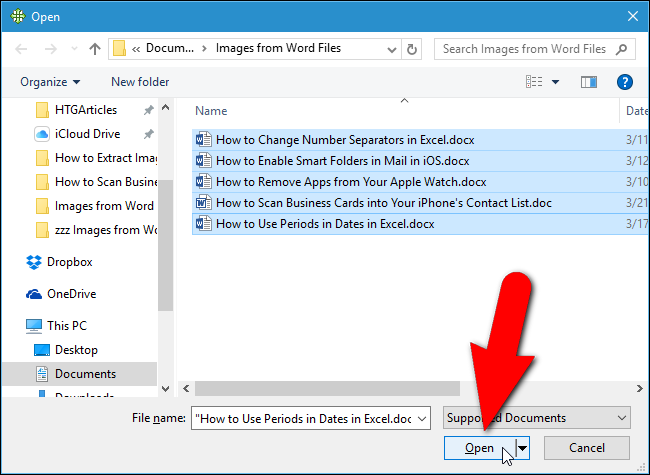
On the Open dialog box, navigate to the folder containing any of the files from which you want to extract images, select the files using the “Shift” or “Ctrl” key to select multiple files, and click “Open”.
You can add files from another folder by clicking “Add Files” again, navigating to the folder on the Open dialog box, selecting the desired files, and clicking “Open”.
Once you’ve added all the files from which you want to extract images, you can choose to create a separate folder for each document within the same folder as each document into which the image files will be saved by clicking the “Create a folder for each document” check box so there is a check mark in the box.
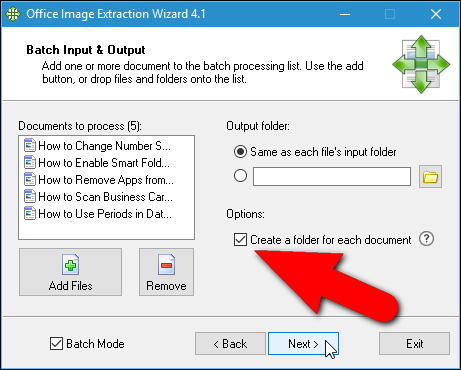
You can also specify the Output folder to be the “Same as each file’s input folder” or enter or select a custom folder using the edit box and “Browse” button below that option. Click “Next” once you have selected the options you want.
Click “Start” on the Ready to Start screen.
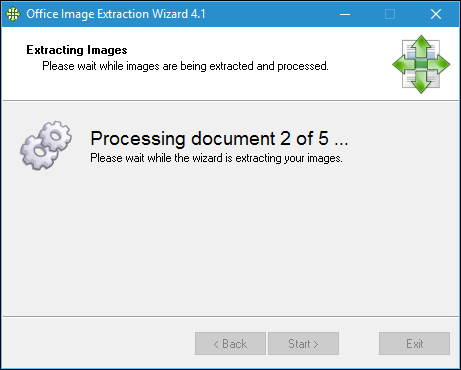
The following screen displays showing the extraction progress.
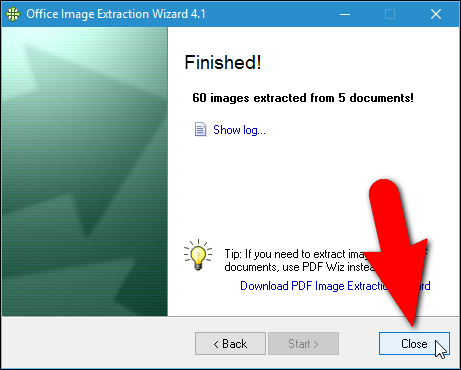
The number of images extracted displays on the Finished screen. Click “Close” to close the Office Image Extraction Wizard.
If you chose to create a separate folder for each document, you will see folders with the same names as the files containing the images, whichever output folder(s) you specified.
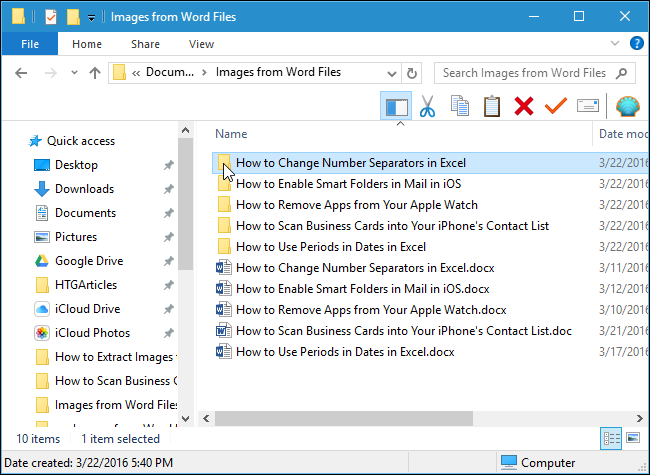
Again, we get all the images as numbered files for each document.
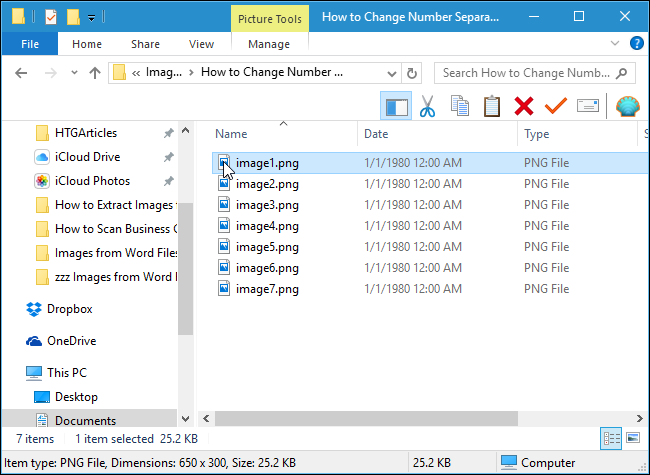
Now you can rename the images, move them, and use them in your own documents. Just make sure you have the rights to use them legally.
Also read:
- [New] How to Make & Download Your Own Instagram Sound
- [SOLVED] Century: Age of Ashes Keeps Crashing on PC
- [Updated] 2024 Approved Excellence in Viewing Windows Phone's Premium Apps
- [Updated] In 2024, Explore the Limitless Potential of FB VR Upload Tips
- [Updated] Top 20 YouTube-Friendly Facebook Video Editors for 2024
- Bypassing the Blockade: How to Successfully Launch Your Adobe App After Encountering Error 0xC0000 c22
- Download Now: New PCDJ Karaoki Beta v0.8.#770 for Testing and Feedback | Unlocked Trial Edition
- Guide: Setting Up Your Input Devices on Android – Mouse, Keyboard & Controllers
- How to Stop Your Football Manager 2022 From Crashing on Windows
- In 2024, 3 Ways to Unlock iPhone 6 without Passcode or Face ID | Dr.fone
- In 2024, Achieve Proficiency in Audio Upload with Google
- In 2024, Childhood Cruisers, Crafted Games
- Increase Your Frame Rate: Proven Methods to Enhance FPS in Ring of Elysium
- Mastering a Stutter-Free Experience in Halo Infinite with These Fixes
- Mastering the Fix: Permanent Solutions for PC Players Struggling with Slime Rancher 2 Downloads
- Mending Windows Update Error 0X8024800C Failure
- Overcome Lag in Fortnite: Expert Tips and Fixes That Work!
- Quick Fix for Gamepad Failures – Get Back to Gaming Now
- Valheim Gaming Guide: Eliminating Stutters & Crashes for Uninterrupted PC Gameplay
- Title: Mastering Data Retrieval From Office Docs: Images, Text, & File Extraction Techniques
- Author: Christopher
- Created at : 2024-12-07 16:37:12
- Updated at : 2024-12-12 18:04:13
- Link: https://win-blog.techidaily.com/mastering-data-retrieval-from-office-docs-images-text-and-file-extraction-techniques/
- License: This work is licensed under CC BY-NC-SA 4.0.