
Mastering Excel's Features: How to Personalize and Utilize the Status Bar

Mastering Excel’s Features: How to Personalize and Utilize the Status Bar
The status bar at the bottom of Excel’s window can tell you all kinds of interesting information, such as whether Num Lock is on or off, the page number, and the average of numbers in selected cells. Even better, you can easily customize the status bar to show just the information you want.
To show and hide items on the status bar, right-click anywhere on the status bar and select the items you want to see. Any items preceded by a check mark will display on the status bar. Note that some items only display on the status bar under certain conditions, even when they are enabled. The Customize Status Bar popup menu stays open so you can select and deselect multiple options. Simply click anywhere outside the popup menu to close it.
In this article, we will describe how some of these options work, and you can also read more about all of the status bar options in Excel .
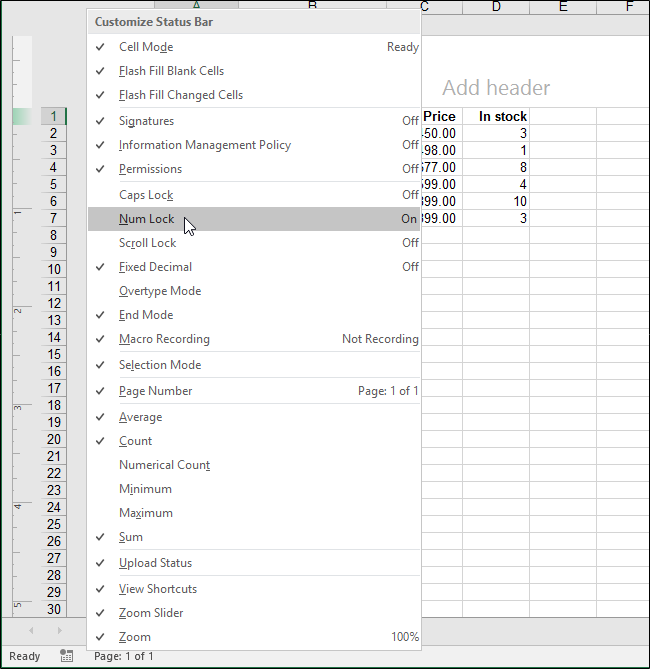
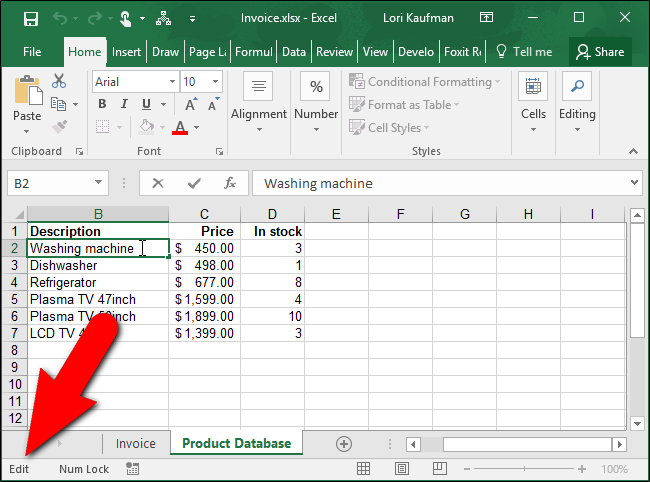
The “Cell Mode” option on the status bar is enabled by default and displays the current cell editing mode on the far left side of the status bar. “Ready” indicates a general state, ready for input. “Enter” displays when you select a cell and start typing or press “F2” twice to start entering data. When you double-click a cell or press “F2” once on a cell to enter data directly in the cell, “Edit” displays as the cell mode. Lastly, “Point” displays when you start to enter a formula and then click the cells to be included in the formula.
Related: What Are the Sys Rq, Scroll Lock, and Pause Break Keys on My Keyboard?
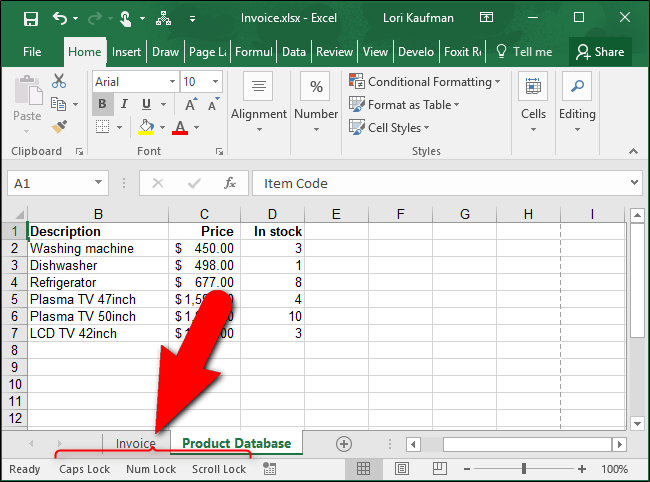
The “Caps Lock”, “Num Lock”, and “Scroll Lock ” options are indicators that show whether these keyboard features are toggled on or off. When these indicators are enabled, they display on the status bar when their respective features are toggled on. If the features are off, you will not see the indicators on the status bar. So, don’t be surprised if you don’t see the indicators on the status bar right away when you enable these options.
Note that clicking on these indicators does not toggle the features on and off. You can only do so from the keyboard.
Related: How to Control Insert/Overtype Mode in Word 2013
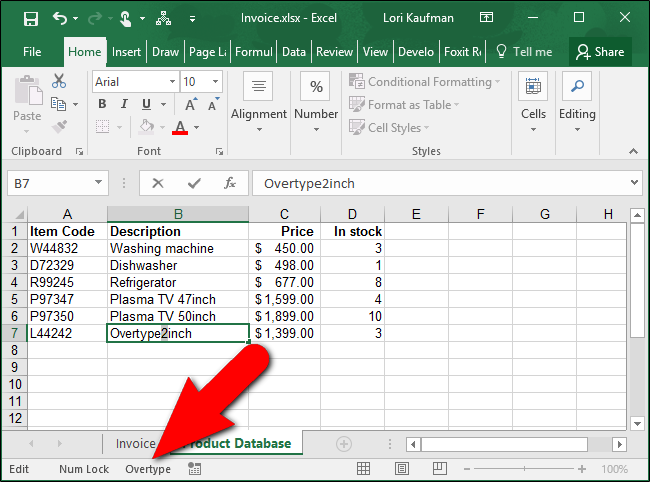
Most of the time, Excel is in “Insert Mode”, which inserts text you type without replacing the text that’s already there. Overtype Mode allows you to replace whatever is to the right of the insertion point as you type. The Insert key on your keyboard allows you to toggle between Insert Mode and Overtype Mode. However, you can’t tell whether Overtype Mode is on or off unless you type something to find out. The “Overtype Mode” option for the status bar indicates whether Overtype Mode is on or off and works the same way as the Caps Lock, Num Lock, and Scroll Lock indicators. When the Overtype Mode option for the status bar is enabled, and Overtype Mode is on, you will see the indicator on the status bar.
Note that the Insert key on the keyboard will always toggle between the Insert Mode and Overtype Mode while you are in Excel. You cannot disable this functionality of the Insert key in Excel like you can in Word .
The Selection Mode option on the status bar is enabled by default and indicates which mode is being used when you are extending or adding to a selection of cells. “Extend Selection” displays on the status bar when you press “F8” to extend the current selection of contiguous cells using the arrow keys. When you want to add a non-contiguous cell or range of cells by pressing Shift+F8, “Add to Selection” displays on the status bar.
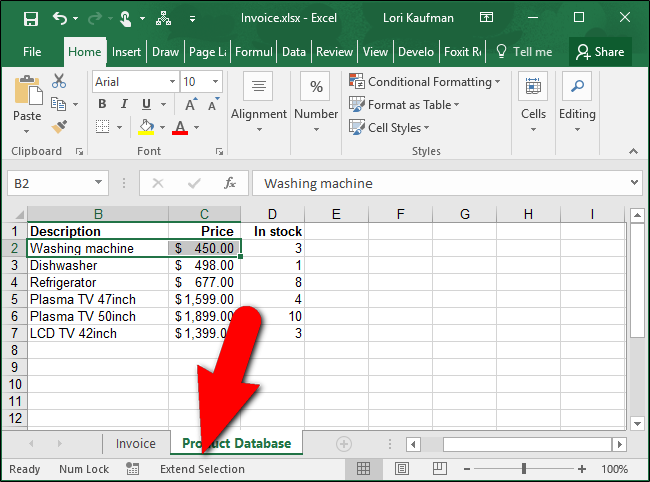
The View Shortcuts option is enabled by default and adds buttons to the status bar for displaying the “Normal” view, “Page Layout” view, and “Page Break Preview” view. Use these buttons to change the view of the current worksheet. Each worksheet in your workbook can have a different view.
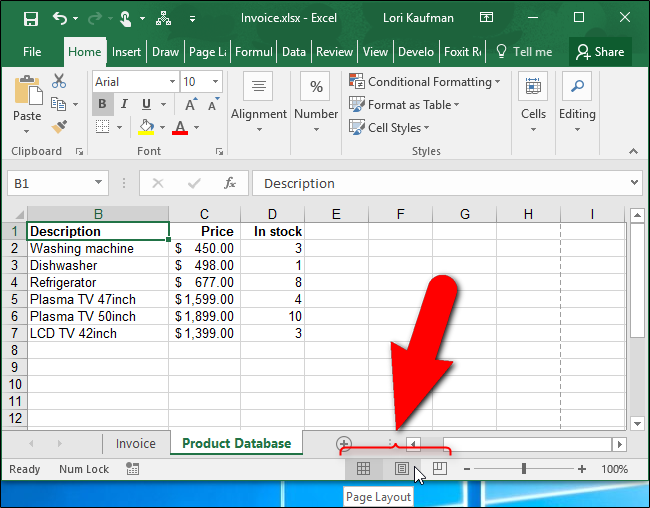
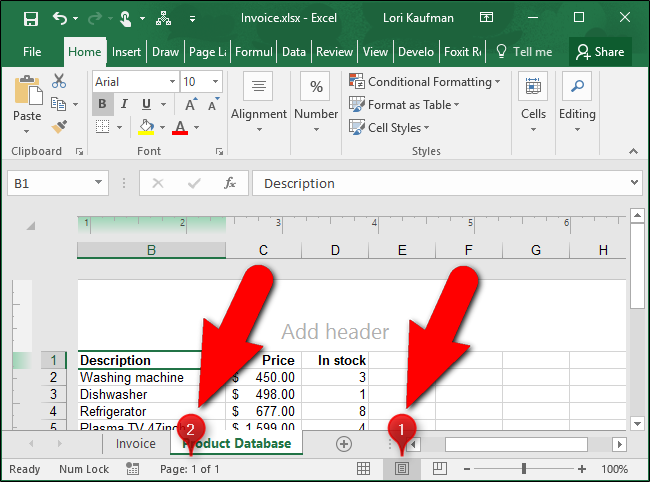
The Page Number option on the status bar is enabled by default and displays the current page number and total number of pages on the left side of the status bar. However, the page number only displays when the Page Layout view is selected from the View Shortcuts described above.
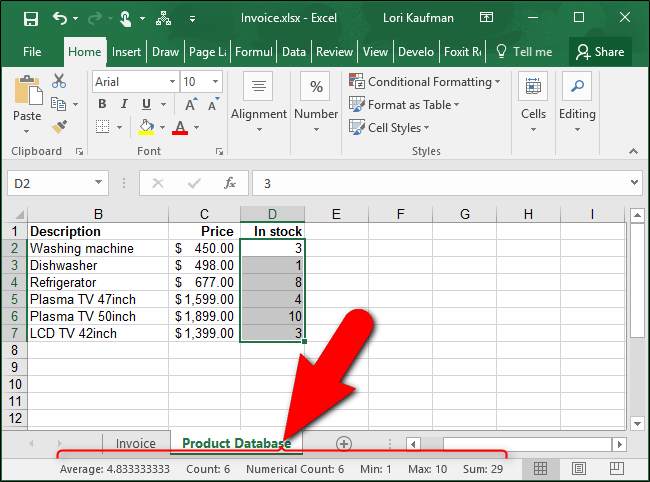
The Average, Count, and Sum options on the status bar are enabled by default. “Average” displays the average calculated from any selected cells containing numerical values. The number of cells currently selected that contain data is indicated by “Count”. “Sum” pretty much does what it says on the tin and displays the sum of the numerical values in the selected cells.
If you want to know how many cells in the current selection contain numerical values, turn on the “Numerical Count” option on the status bar. You can also find out the “Minimum” and “Maximum” numerical values in the currently selected cells.
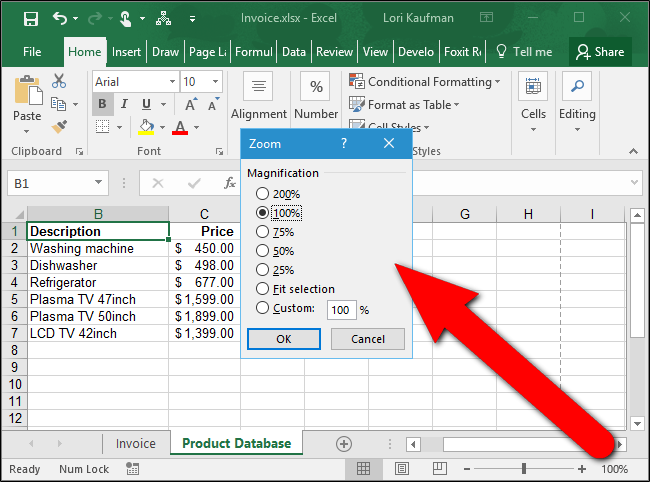
The Zoom percentage and Zoom slider are enabled by default and allow you to zoom in to have a closer look at your worksheet, or zoom out to see more of your worksheet at once. Clicking the “Zoom” percentage on the far right side of the status bar opens the Zoom dialog box allowing you to select a percentage of magnification, fit the selection to the window, or enter a custom percentage. You can also use the Zoom slider to quickly zoom in and out or use the “Zoom Out” (minus) and “Zoom In” (plus) buttons.
In earlier versions of Excel, you could hide the status bar if you wanted more space available for your worksheets. However, that capability was removed starting with Excel 2007. So you might as well make it as useful as possible.
Also read:
- [New] 2024 Approved Optimal Live Streaming Scenery Ideas
- [Updated] In 2024, In-Depth Analysis of Altering Facial Gender on Social Platforms
- 2024 Approved The Minimum View Count for YouTube Success Stories
- Essentiële Gids Voor Hidden Files Op USB-Sticks: Locatie, Controlelement & Uitemaken
- Get Back to Gaming Fast: Overcoming MultiVersus Launch Obstacles on Your Desktop Computer
- Get Your Discord Streaming Up & Running - Overlay Issues No More
- How Can I Use a Fake GPS Without Mock Location On Oppo Find N3 Flip? | Dr.fone
- How to Access Your iPhone 6s Plus When You Forget the Passcode? | Dr.fone
- Nvidia Overlay Malfunction? Here's How You Can Get It Running Again
- Overcoming DS4 Connectivity Problems in Windows - A Guide to Effective Driver Reinstallation
- Sandstorm Stability Improvements for a Seamless Insurgency Experience
- Solutions for Resolving the Missing oleAut32.dll File on Your PC
- Title: Mastering Excel's Features: How to Personalize and Utilize the Status Bar
- Author: Christopher
- Created at : 2024-12-05 16:28:46
- Updated at : 2024-12-12 19:26:10
- Link: https://win-blog.techidaily.com/mastering-excels-features-how-to-personalize-and-utilize-the-status-bar/
- License: This work is licensed under CC BY-NC-SA 4.0.