
Mastering Window 11: The Complete Tutorial on Manually Patching Your System with New Updates

Mastering Window 11: The Complete Tutorial on Manually Patching Your System with New Updates
Quick Links
- If Your Updates Failed, Clear the Downloaded Updates First
- From Windows Settings
- From Microsoft Update Catalog
- Using Command Prompt
- Using Windows PowerShell
Key Takeaways
- First, clear the downloaded update files by stopping the Windows Update service and removing all files from the Windows Update cache folder.
- Then, use the options on the Settings > Windows Update screen to force install the available updates. Another way is to manually grab updates from Microsoft Update Catalog and install those updates.
- You can also use a command in Command Prompt or a cmdlet in PowerShell to find and install the available Windows updates.
If automatic updates have failed to install, you have alternate ways to manually update your Windows 11 PC. We’ll show you the available methods, so you can get the latest bug fixes and possibly new features on your computer. Let’s get started.
If Your Updates Failed, Clear the Downloaded Updates First
Before using alternate update methods, remove the downloaded update files to prevent any potential issues. The alternate methods will re-download the required update files anyway, so you won’t lose anything.
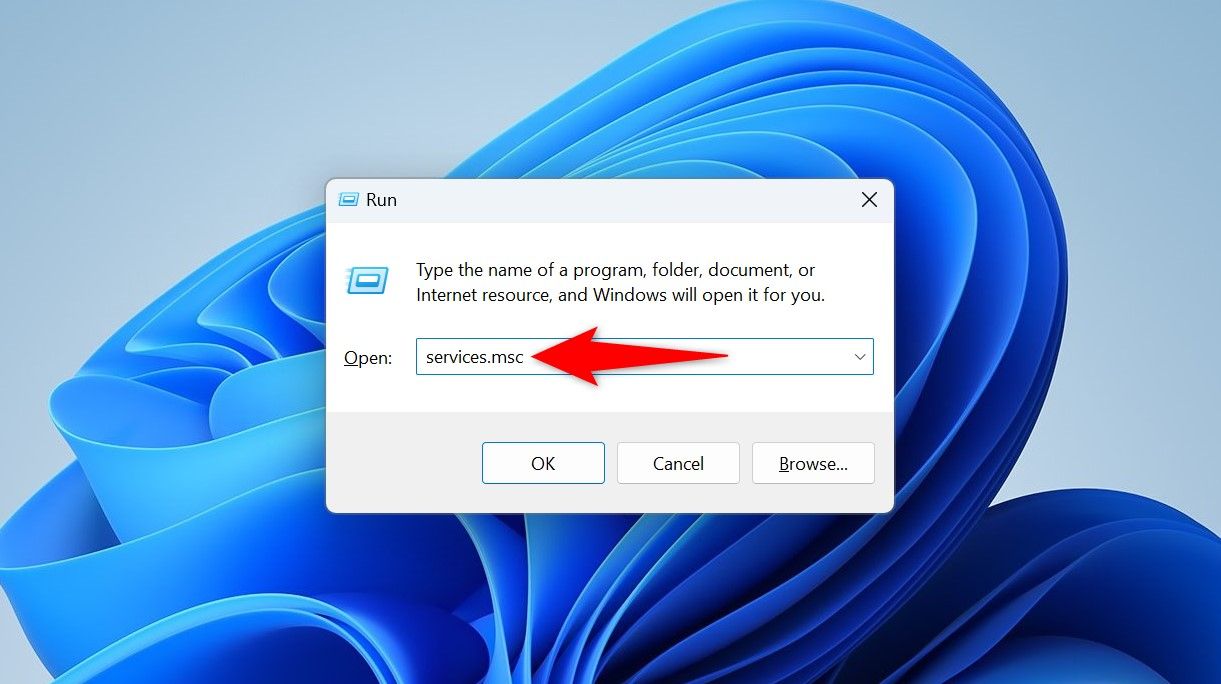
To clear the Windows Update cache, launch Run by pressing Windows+R. Type the following in the box and press Enter or select “OK.”
`services.msc`
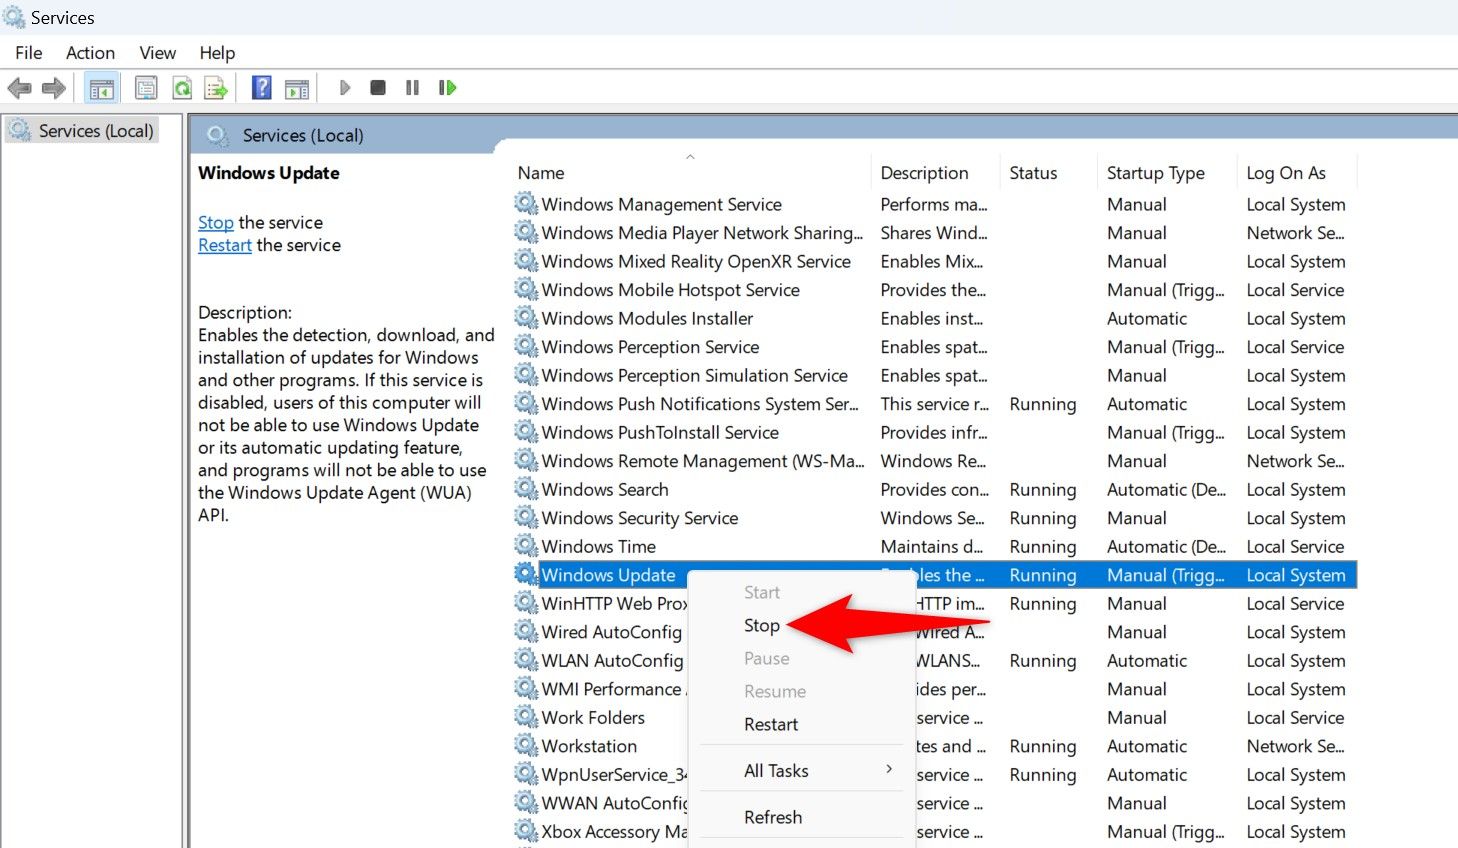
In the Services window, find the “Windows Update” service, then right-click the service and choose “Stop.” If you don’t stop this service, Windows won’t let you clear the update cache, since the files will be “in use.”
If the Windows Update service fails to stop, restart your PC and try again.
Keep the Services window open, as you’ll return here shortly. Open the Run dialog box again by pressing Windows+R. Type the following path in the box and press Enter. If you’ve installed Windows on a drive other than C, replace the drive letter in the path.
`C:\Windows\SoftwareDistribution\`
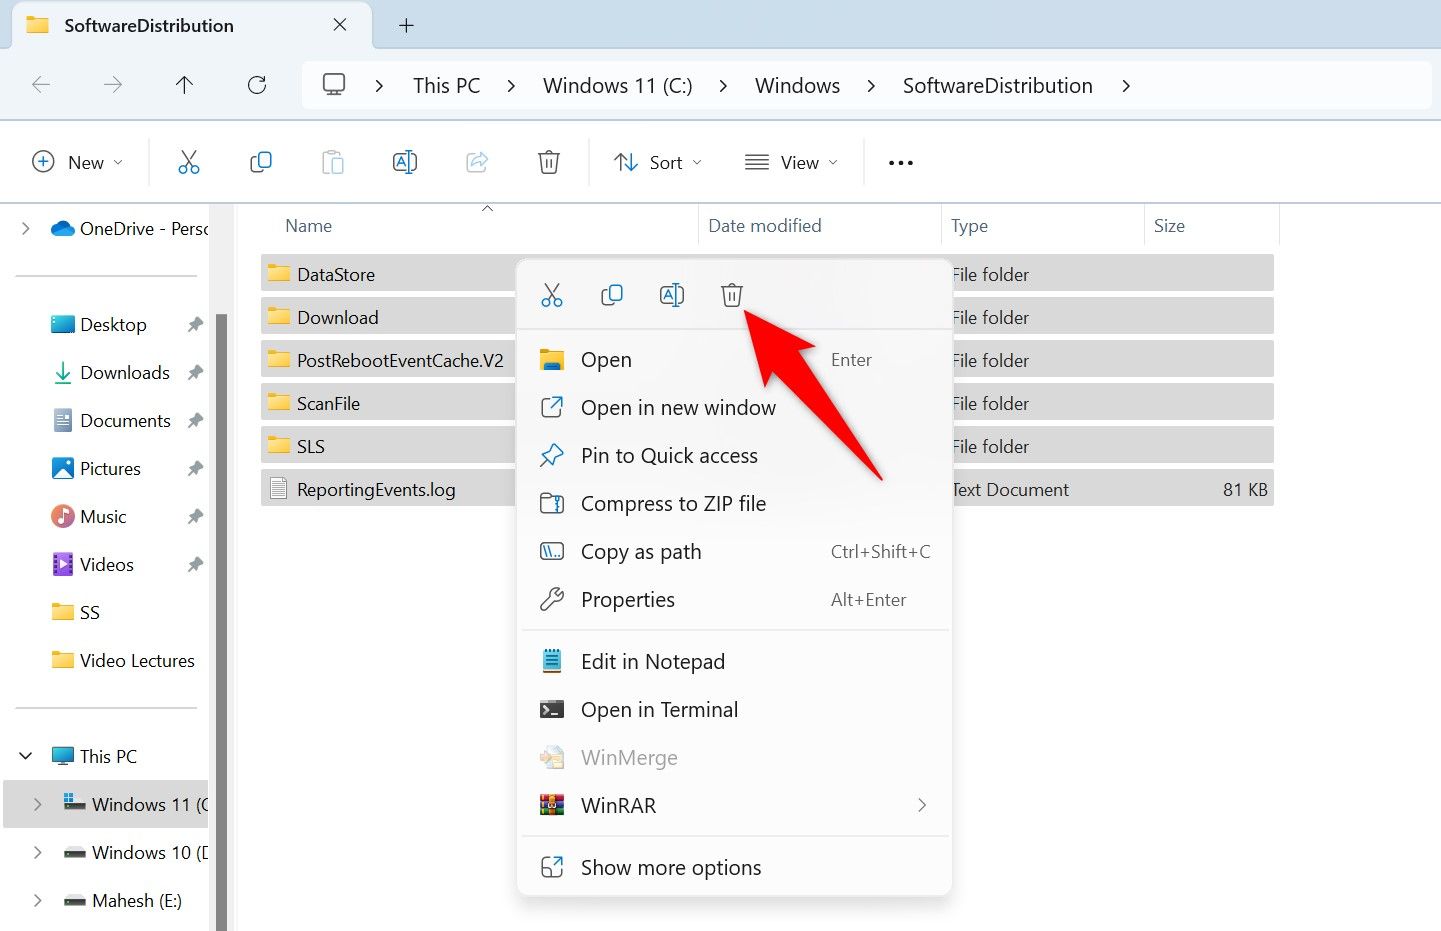
You’re now in the Windows Update cache folder. Select all files here by pressing Ctrl+A, right-click any of the selected files, and choose the trash can icon.
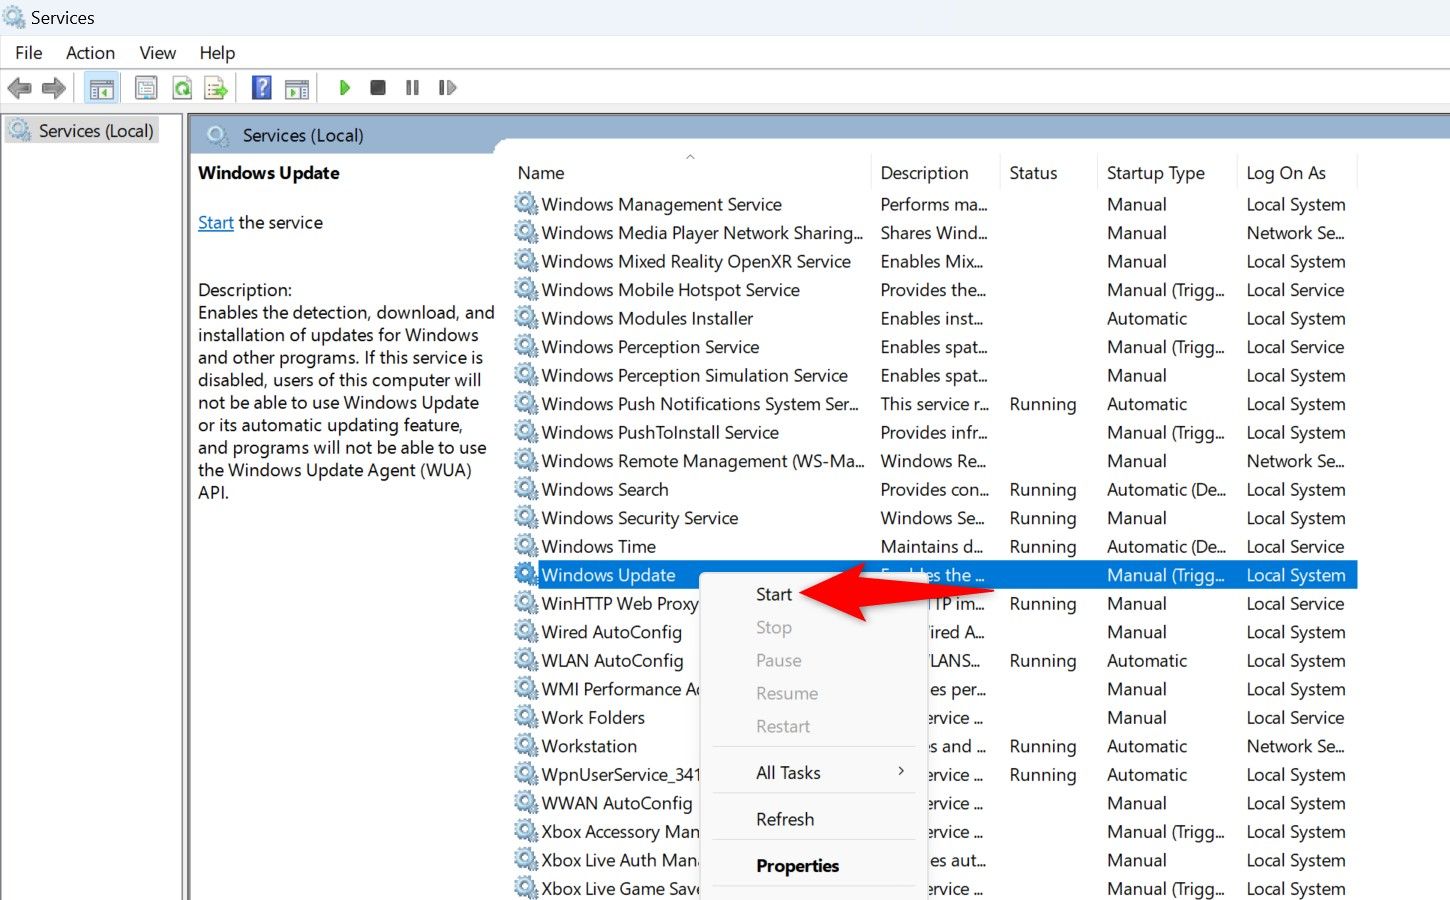
You’ve removed all the update files. Close File Explorer, return to the Services window, right-click the “Windows Update” service, and choose “Start.”
You’re set.
From Windows Settings
One way to force updates to install is by using the Settings app. Here, you can choose whether to install the available updates or only specific ones.
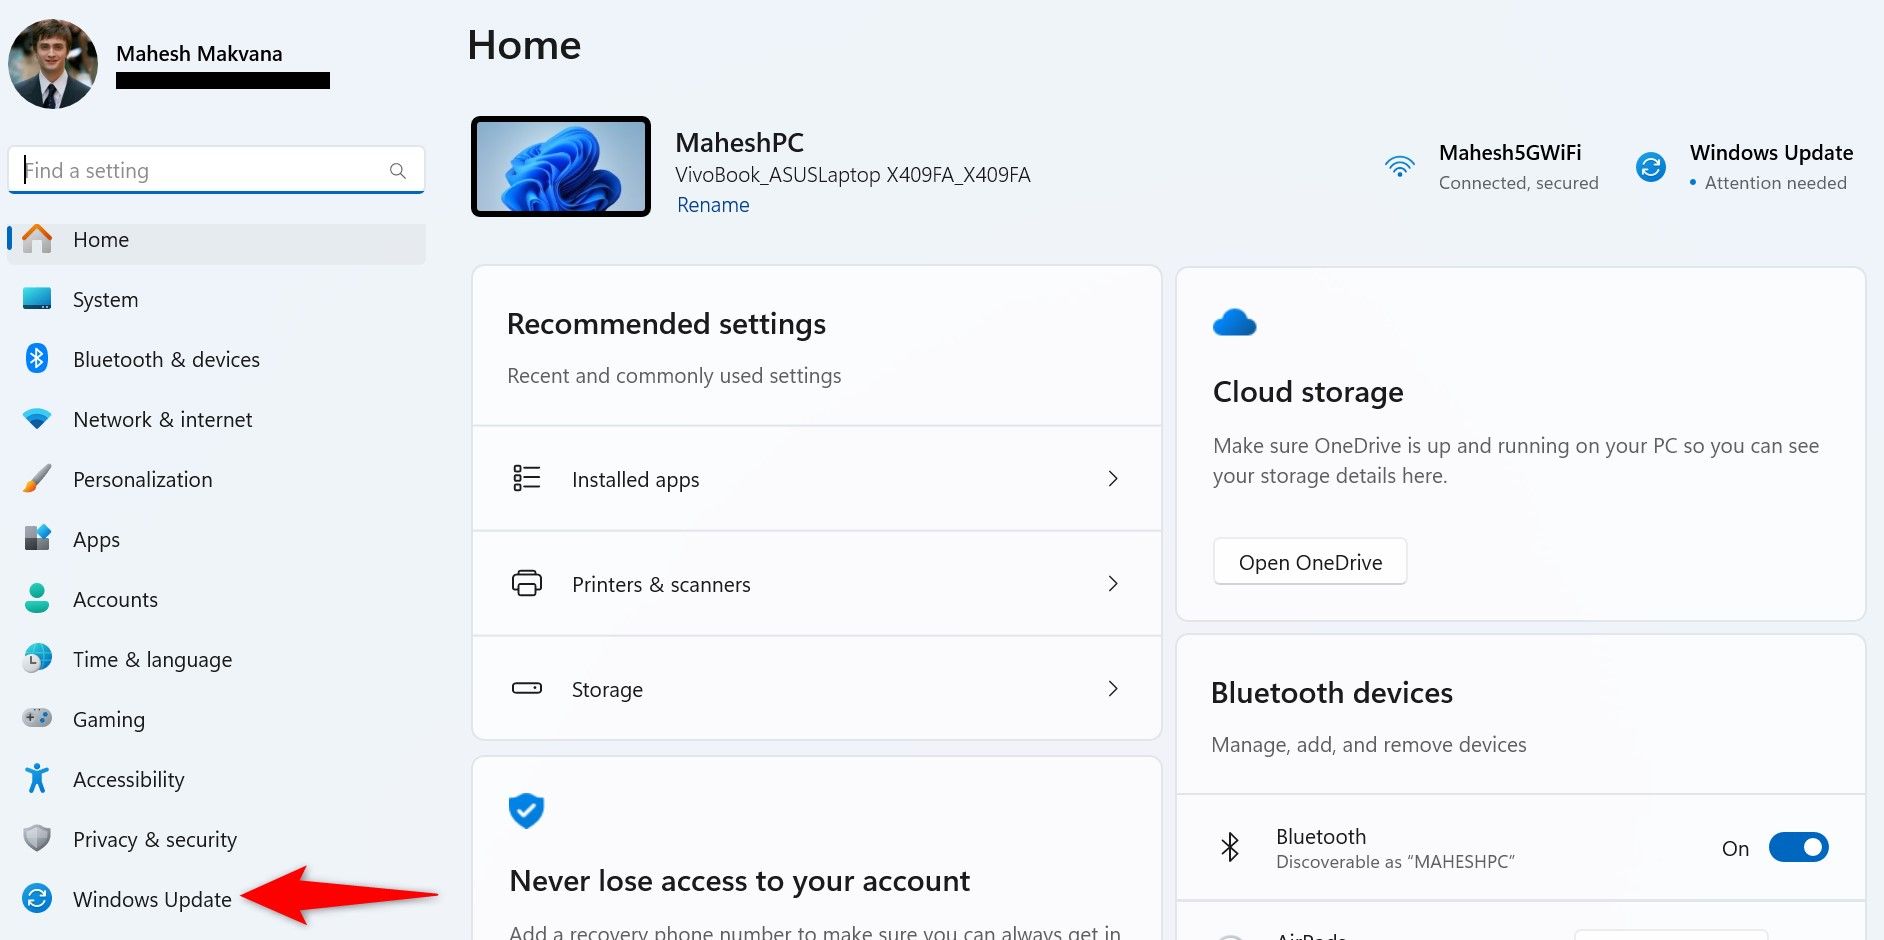
To use this method, launch Settings by pressing Windows+i. At the bottom of the left sidebar, choose “Windows Update.”
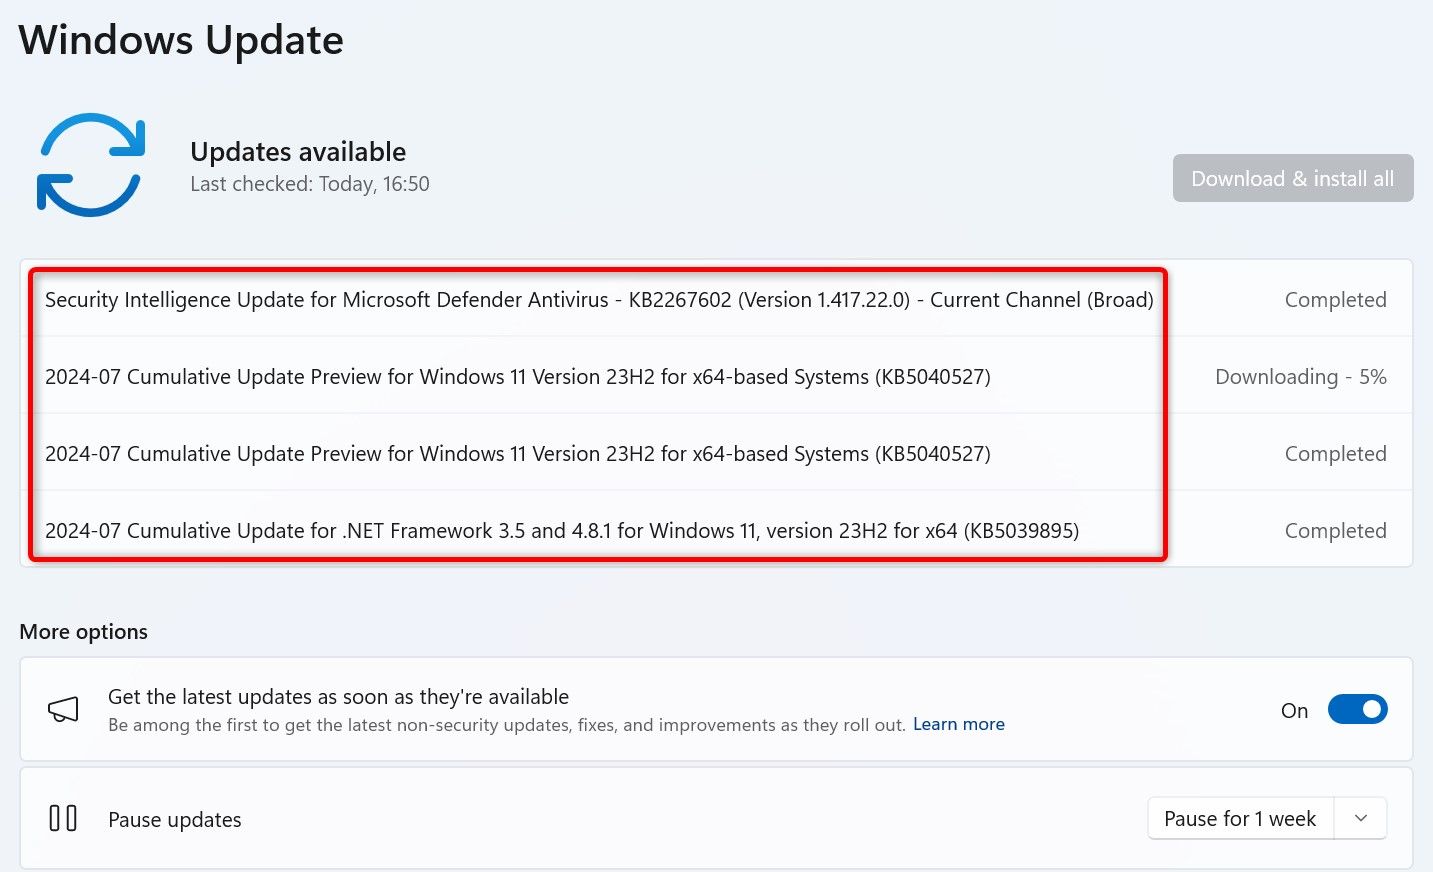
On the right pane, click “Download & Install All” to download and install the available updates. To only download and install specific updates, click the button next to those updates.
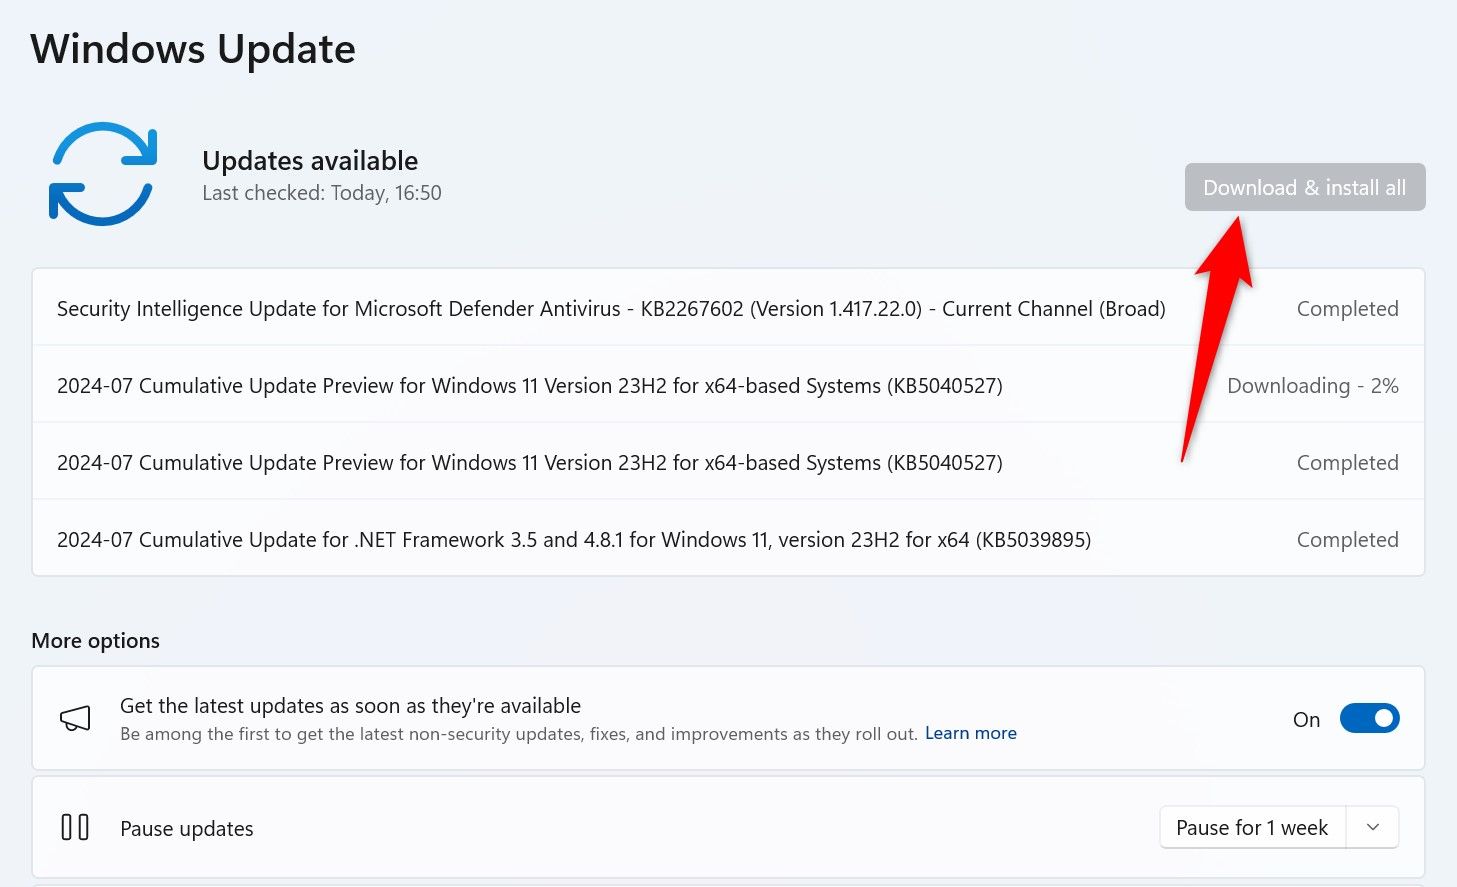
Wait while Windows obtains and installs the selected updates, then reboot your Windows 11 PC .
From Microsoft Update Catalog
Microsoft Update Catalog is a site where you can find and download any Windows update you want. This allows you to manually download an update and then install that update on your PC—all without using the Windows Update feature.
To use this method, find the name of the update you want to download. You can find this information on the Settings > Windows Update page. The update names usually start with KB.
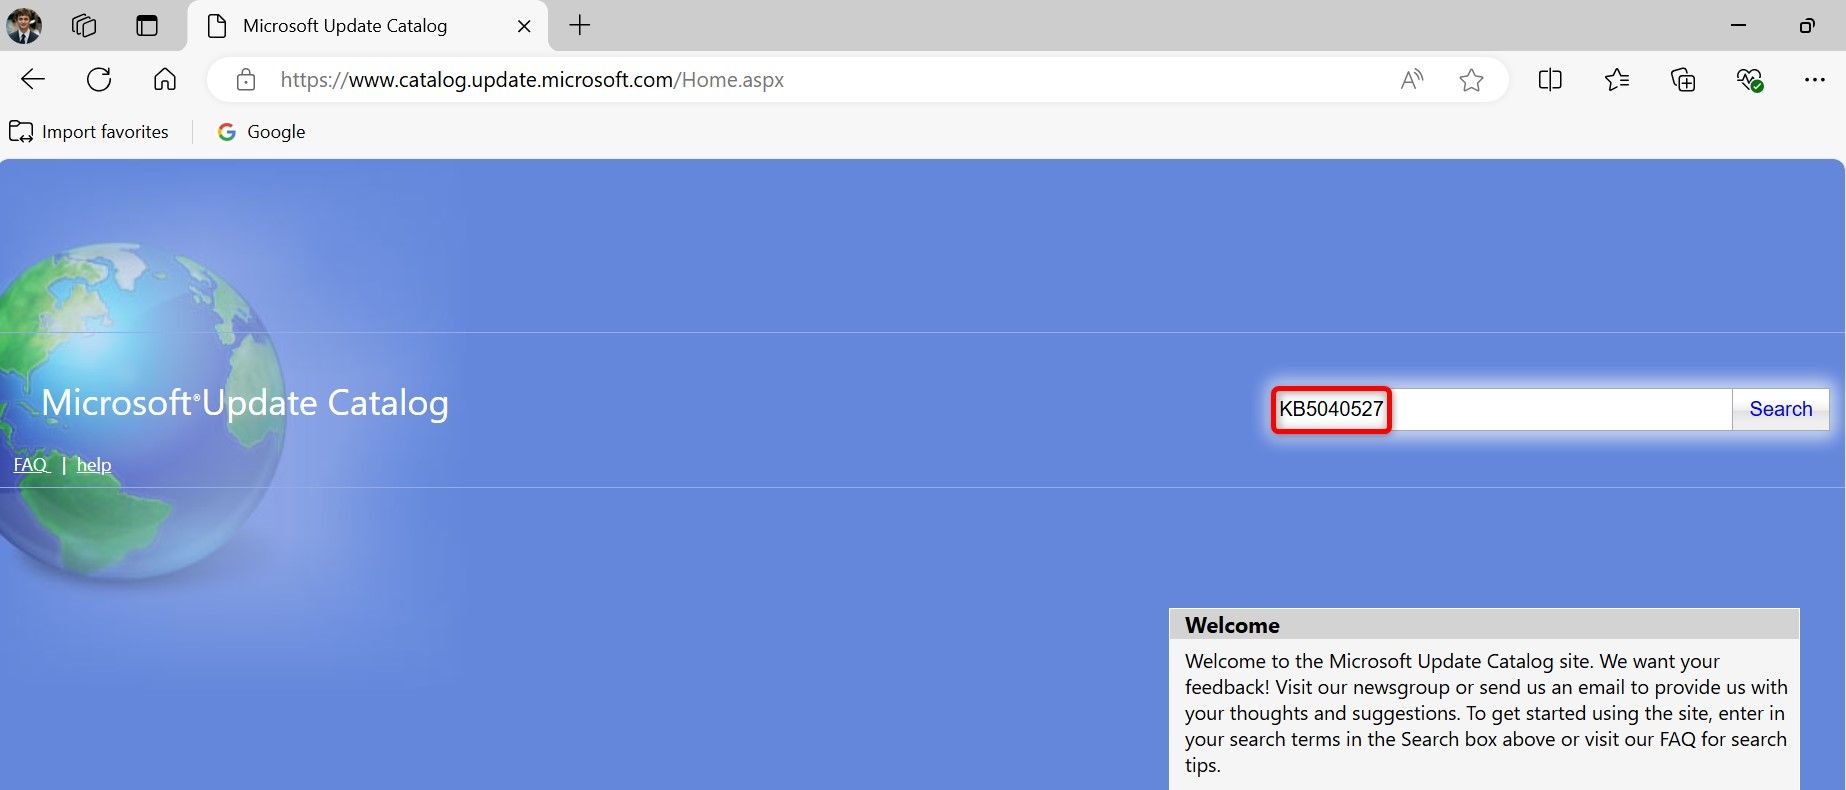
Then, launch a web browser and head to the Microsoft Update Catalog site . Select the site’s search box, type the update name you noted, and press Enter or select “Search.”
On the following screen, find the exact update and click “Download” next to that update.

In the open window, click the update name to begin downloading the update to your PC. The download can take anywhere from a few seconds to several minutes, depending on the update size and your internet connection speed.
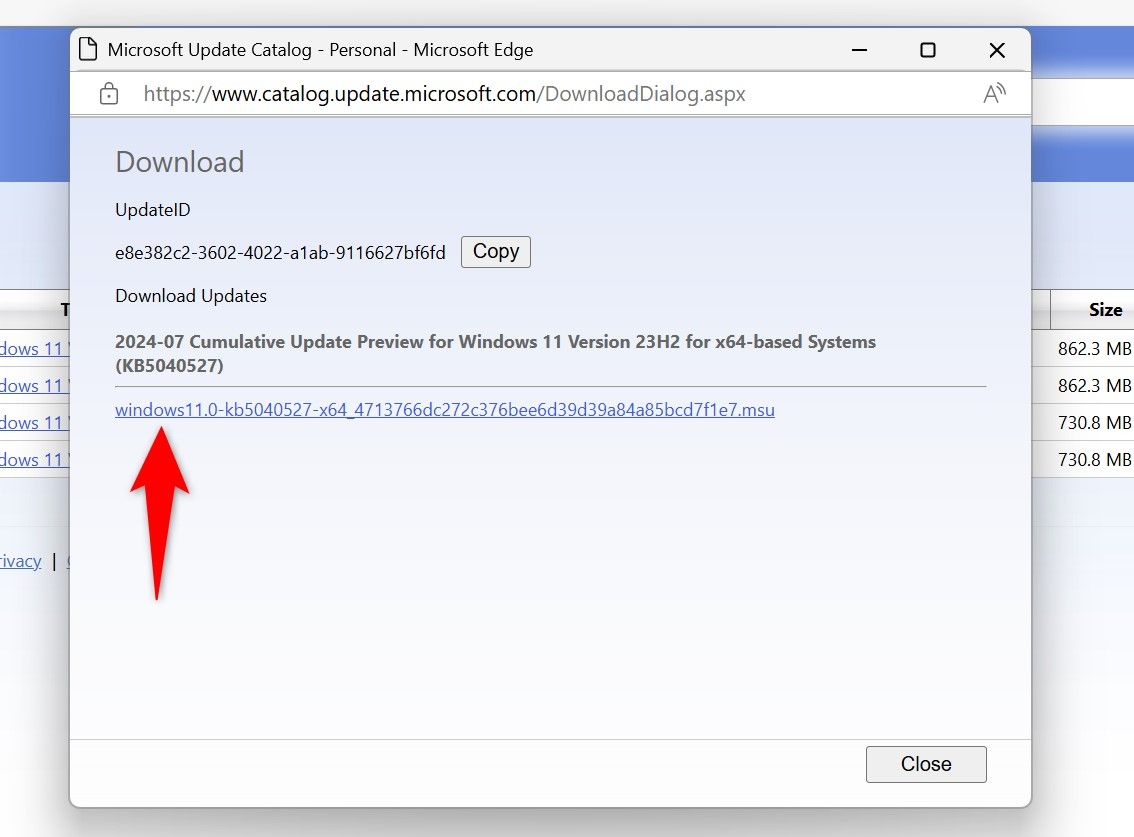
After downloading the update, run the update file and follow the on-screen instructions. The file will extract the update files and install the update on your system.
Using Command Prompt
Command Prompt offers a command that you can use to install an already-downloaded update on your PC. This is a great method to use when your update fails to install via the graphical user interface (GUI).
To use this method, head over to the Microsoft Update Catalog site . Select the search box, type the update name, and press Enter or select “Search.”
Find the update to download on the list and click “Download” next to the update. In the open window, select the update name to save the update to your computer.
After successfully downloading the update, open Command Prompt . Do this by pressing the Windows key, typing Command Prompt, and selecting “Run as Administrator.”
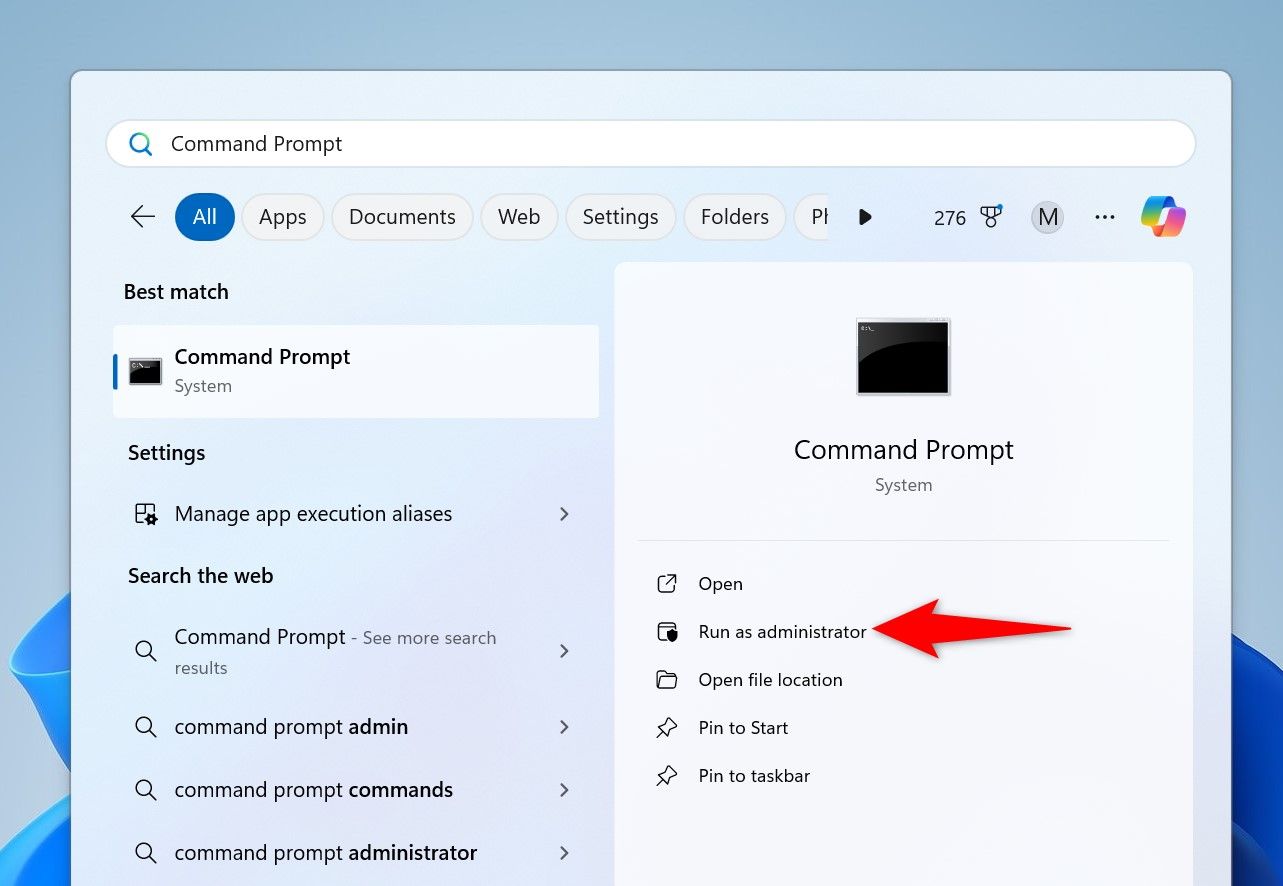
In the User Account Control prompt, select “Yes.”
In Command Prompt, type the following command replacing UPDATE with the full path to the update file you downloaded. Then, press Enter.
`wusa UPDATE /quiet /norestart`
As an example, I’ll run the following command to install an update that I’ve downloaded:
`wusa "C:\Users\mahes\Downloads\windows11.0-kb5040527-x64_4713766dc272c376bee6d39d39a84a85bcd7f1e7.msu" /quiet /norestart`
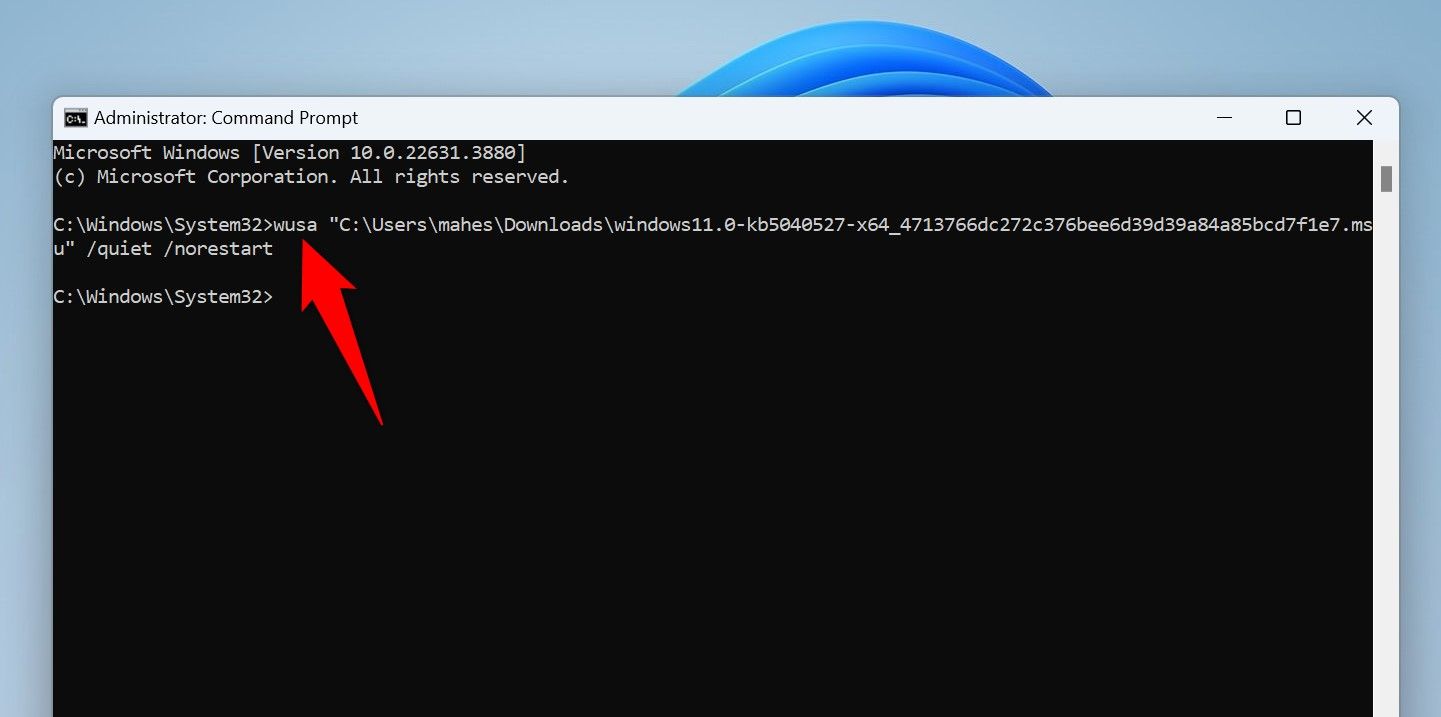
Run the following command to check if the update was successfully installed:
`wmic qfe list brief /format:pagele`
If the update was successfully installed, restart your PC by running the following command . This brings the new changes into effect.
Make sure to save any unsaved work before you run the command.
`shutdown /r /t 00`
And your Windows PC is now up-to-date.
Using Windows PowerShell
PowerShell allows you to find all the available updates for your PC and then download and install those updates. Unlike with Command Prompt, you don’t need to manually download the updates first.
To use this method, open Windows Search, type PowerShell, and select “Run as Administrator.” In the User Account Control prompt, select “Yes.”
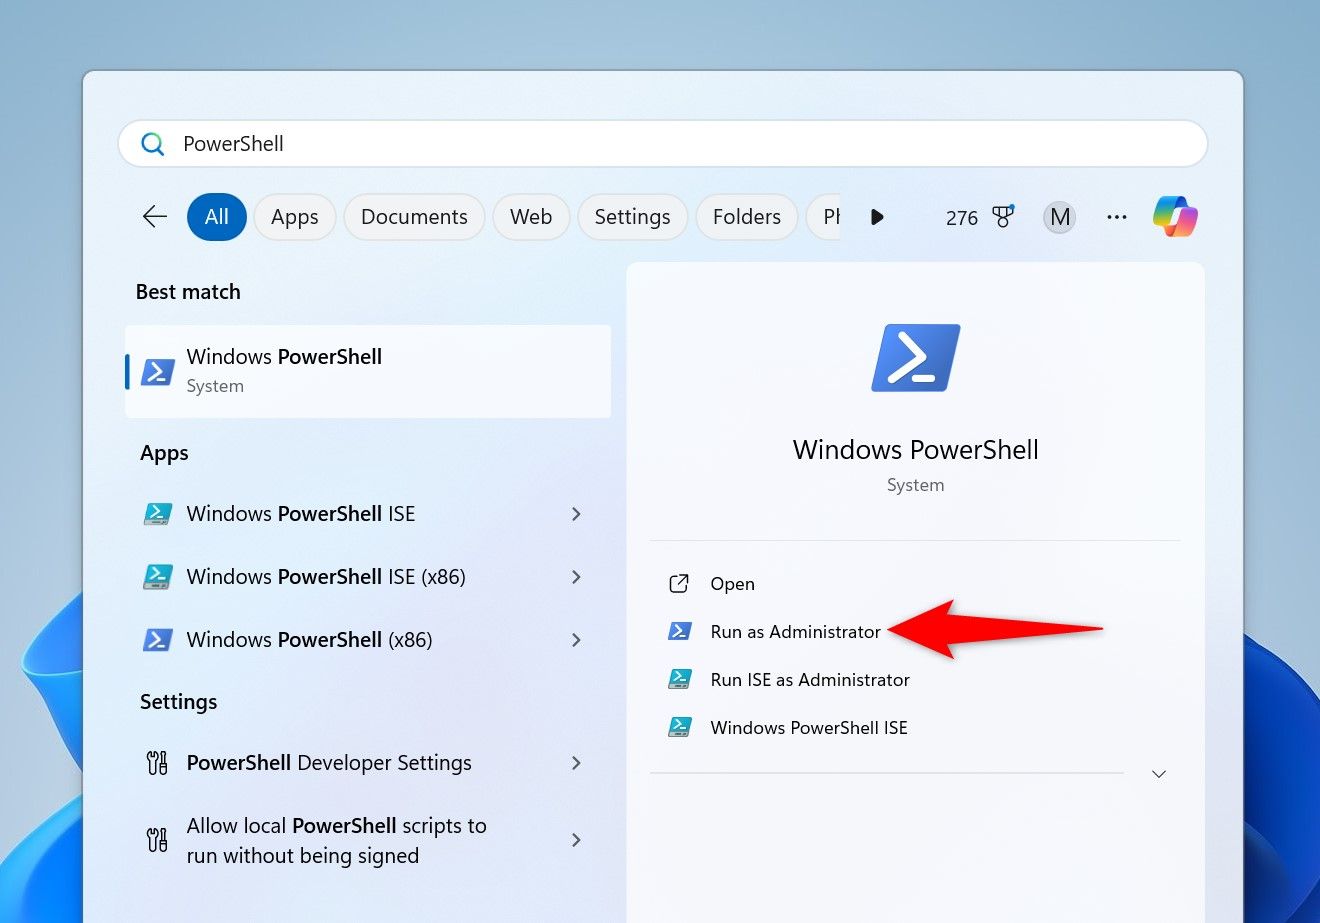
In PowerShell, type the following command (called a cmdlet ) and press Enter. This cmdlet installs the Windows Update module to allow you to manage Windows updates from PowerShell.
`Install-Module PSWindowsUpdate`
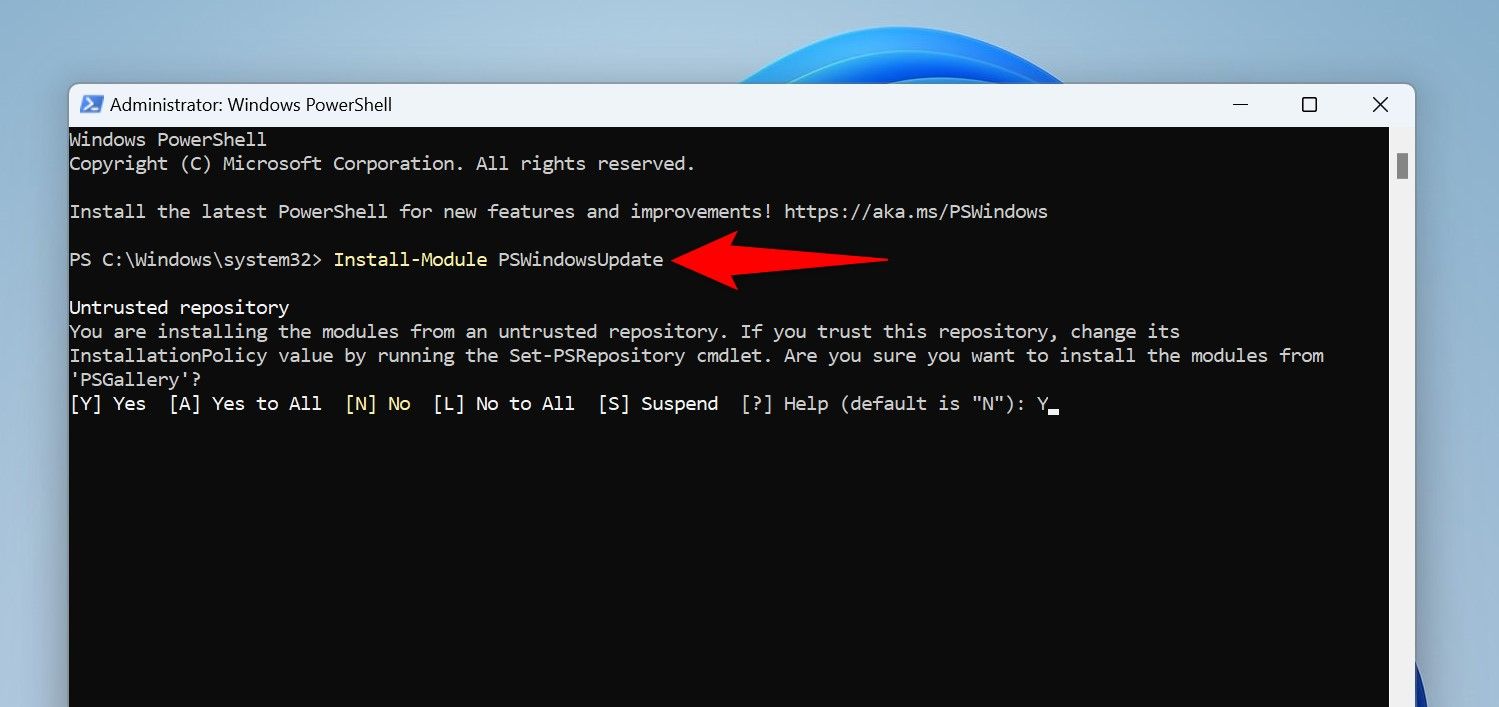
When PowerShell prompts, type Y and press Enter. Then, run the following cmdlet, type Y, and press Enter:
`Set-ExecutionPolicy -ExecutionPolicy RemoteSigned -Scope CurrentUser`
Next up, use the following cmdlet to launch the newly-installed module:
`Import-Module PSWindowsUpdate`
Find the available Windows updates by running the following cmdlet:
`Get-WindowsUpdate`
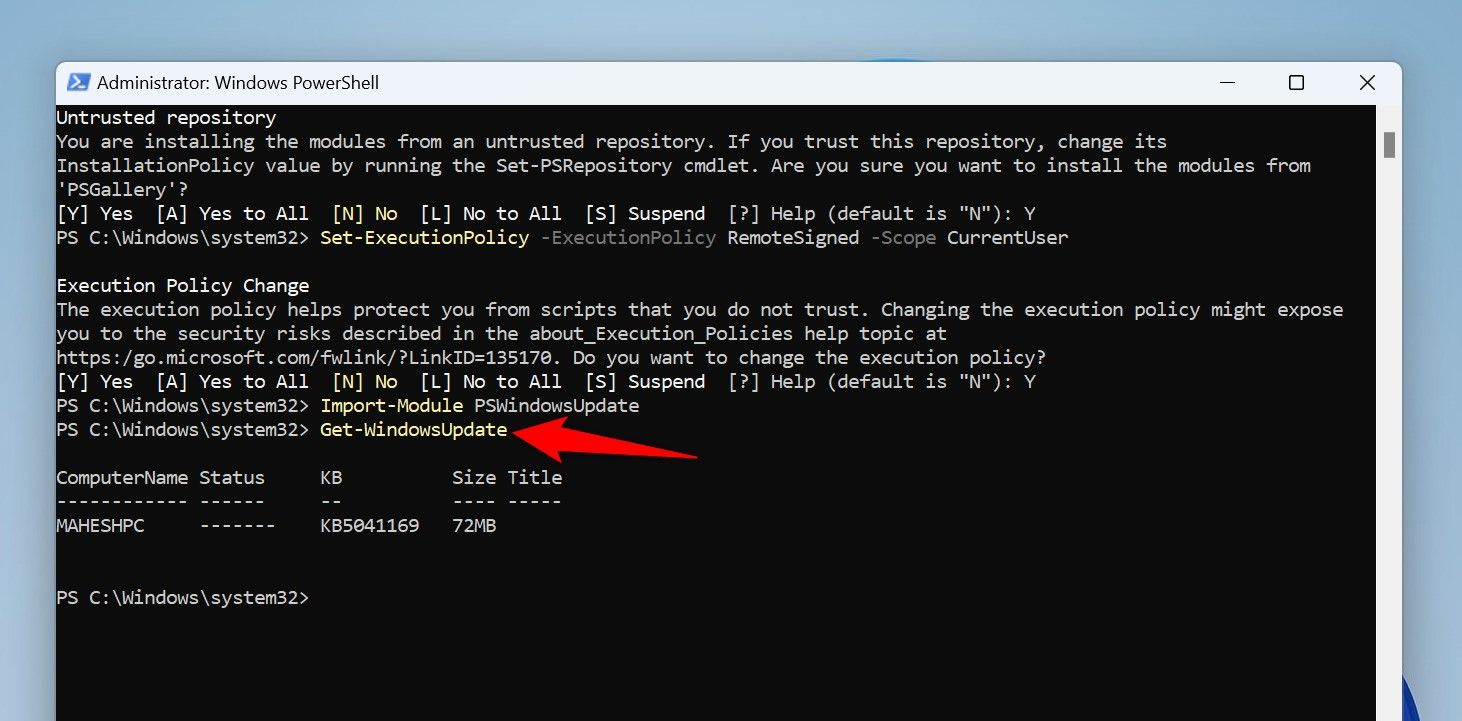
To download and install all the available updates, use the following cmdlet:
`Install-WindowsUpdate`
To download and install a specific update, use the following cmdlet. Make sure to replace UPDATENUMBER with the update to install in the cmdlet.
`Install-WindowsUpdate -KBArticleID UPDATENUMBER`
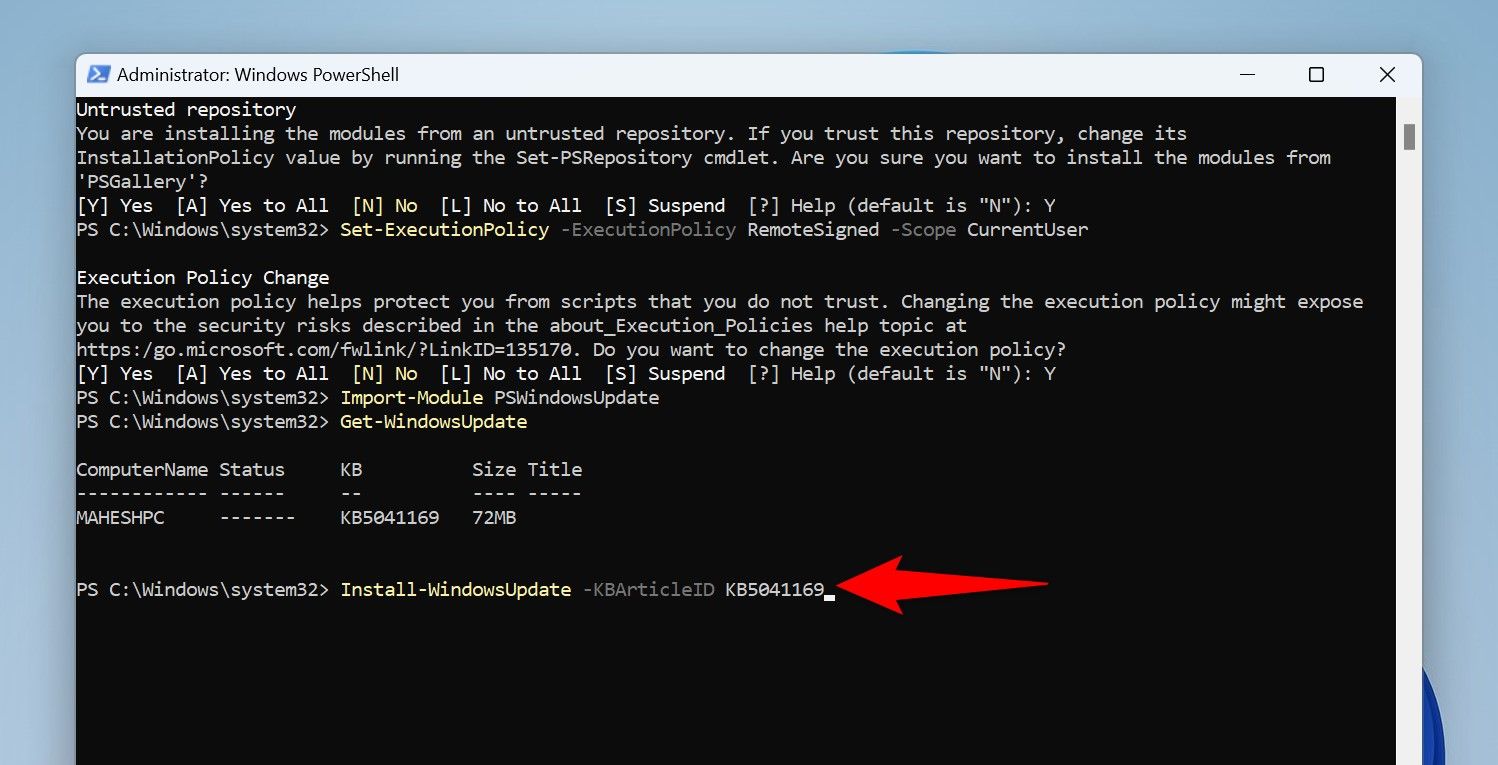
PowerShell will install all or select updates (as you specified). Then, give your PC a restart to bring the changes into effect.
And that’s how you overcome the automatic update issues and get the latest updates on your Windows 11 computer. Enjoy!
Also read:
- [New] 2024 Approved Easy Replay on iPhone Set Videos Cycling
- [New] In 2024, Channel Buying Made Simple A Beginner’s Toolkit
- [New] In 2024, Premium Screen Recording Selections
- [Updated] 2024 Approved Discovering the Heart of Editing - Filmora’s Top Choices
- Diagnosing & Repairing Battlefield 2042 DirectX Errors - A Comprehensive Guide
- Easy Guide: Integrating Videos Into Your PDF Documents
- Elevate Gaming Experience with Improved Frame Rates: How to Boost FPS in Ring of Elysium
- Guide to Stabilize Your Gameplay - Resolving Mount & Blade 2: Bannerlord's Crashing Problems
- Lightning Lingers Quick & Fluid Gaming Choices for Laptops
- Mastering Apex Legends: Eliminating the Error Code 'Leaf' In the New Update
- Tips and Tricks for Apple ID Locked Issue From Apple iPhone SE
- Title: Mastering Window 11: The Complete Tutorial on Manually Patching Your System with New Updates
- Author: Christopher
- Created at : 2024-12-06 18:45:24
- Updated at : 2024-12-12 16:49:42
- Link: https://win-blog.techidaily.com/mastering-window-11-the-complete-tutorial-on-manually-patching-your-system-with-new-updates/
- License: This work is licensed under CC BY-NC-SA 4.0.