
Step-by-Step Guide: Activating Macros on Your Microsoft Excel Spreadsheet

Step-by-Step Guide: Activating Macros on Your Microsoft Excel Spreadsheet
Quick Links
- Be Smart When Enabling Macros
- How to Turn On Macros for a Specific Excel Spreadsheet
- How to Enable Macros for All Excel Spreadsheets
Using Microsoft Excel macros, you can run a prerecorded set of steps to automate many of your repetitive tasks. You’ll have to turn on the feature before you can use it. We’ll show you how to activate macros on a per-spreadsheet basis as well as for all spreadsheets in Excel.
Be Smart When Enabling Macros
Enabling macros is not always safe and you should only use them when you’re sure of the source of your spreadsheets. Good macros save you time by automating your tasks, but there are bad macros that can harm your machine.
Related: Macros Explained: Why Microsoft Office Files Can Be Dangerous
For example, if you’ve got your spreadsheet from an unknown source, you shouldn’t trust it to run any macros as you aren’t sure what it will end up doing. However, if you know the sender and you trust them, then it should be okay to allow your spreadsheets to execute macros.
How to Turn On Macros for a Specific Excel Spreadsheet
To enable macros in a specific spreadsheet and not all spreadsheets, then first, open your spreadsheet with Microsoft Excel.
When your macro-enabled spreadsheet opens, Excel will display a message at the top of the spreadsheet content. To allow this file to run macros, then next to the message, click “Enable Content.”
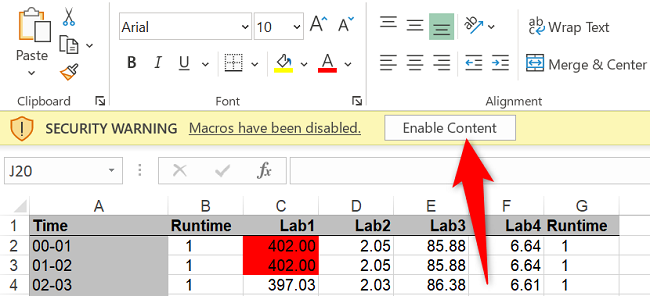
Excel will allow the current file to execute its macros, and you’re all set.
Related: How to Disable the Security Warning Message Bar in Microsoft Office Programs
How to Enable Macros for All Excel Spreadsheets
It’s not recommended to activate macros for all your spreadsheets, but if you’re sure you’ll only open safe and trusted files, then you can turn on the option as follows.
Activate Macros in Excel on Windows
If you’re a Windows user, first, launch Microsoft Excel on your PC.
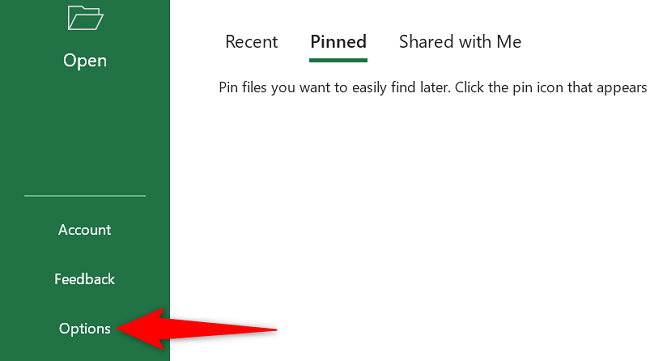
In Excel’s left sidebar, click “Options.” If you’re on a spreadsheet screen, then choose File > Options instead.
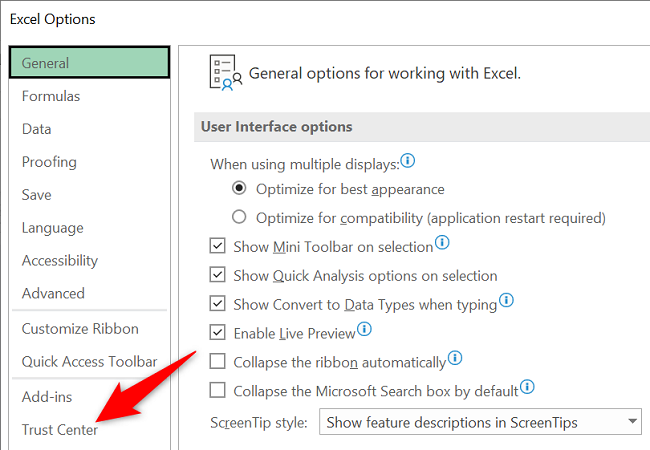
On the “Excel Options” window, in the left sidebar, click “Trust Center.”
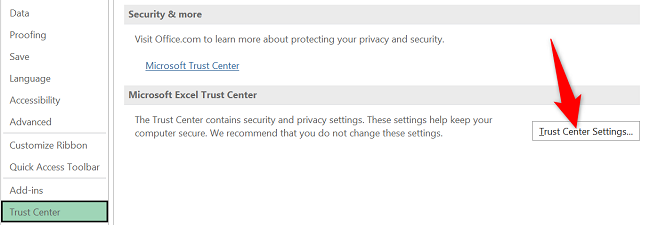
On the right pane, click the “Trust Center Settings” button.
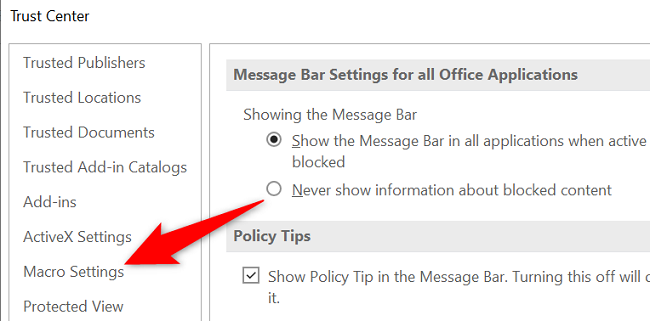
You’ll see a “Trust Center” window. In the left sidebar of this window, click “Macro Settings.”
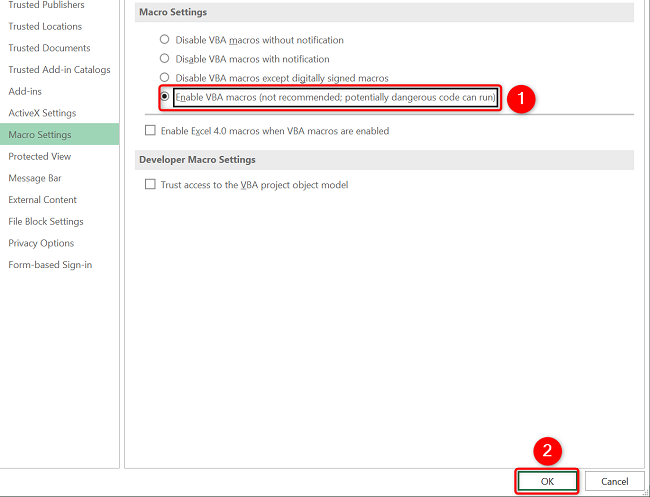
On the right pane, activate the “Enable VBA Macros (Not Recommended; Potentially Dangerous Code Can Run)” option. Then select “OK” at the bottom.
In the future, to disable macros for all spreadsheets, select an appropriate option on this screen.
Select “OK” at the bottom of the “Excel Options” window.
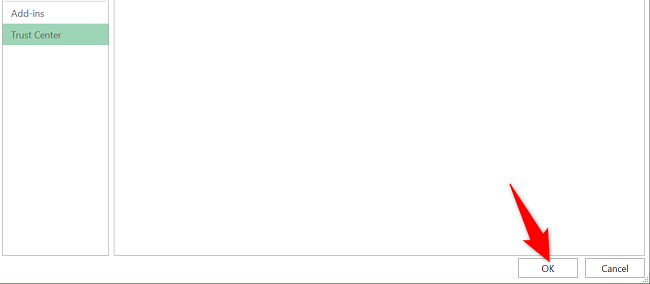
And that’s it. Excel will now allow any spreadsheet to run macros.
Activate Macros in Excel on Mac
To turn on Excel macros on your Mac, first, launch the Excel app.
In Excel, click Excel > Preferences > Security & Privacy. Then, turn on the “Enable All Macros (Not Recommended; Potentially Dangerous Code Can Run)” option.
You’re done.
And that’s how you allow your spreadsheets to run codes and automate your tedious tasks.
If you’d like to learn more about Excel macros, then check out our dedicated guide on the topic. It will walk you through the process of creating a macro with an example.
Related: Learn How to Use Excel Macros to Automate Tedious Tasks
Also read:
- [New] Direct Transformation From GIF to Video with Best Web Services
- [SOLVED] Battlefield 4 Not Launching on PC
- [Updated] Efficiently Speaking Out A Blueprint for Reporting Incidents in Digital Communities for 2024
- [Updated] Stepwise Guide to YouTube Video Enhancement in iMovie
- 2024 Approved Essential Sandbox Experiences for Gamers
- Ascent on Your PC? Overcome Those Annoying Crashes with This Step-by-Step Guide!
- Boost Your Dragon's Dogma 2 Gaming Experience by Resolving Low FPS and Freezing Problems
- Channel Compendium Best of the Bunch - Historical YouTubes For Study
- Expert Advice on Fixing the Problematic NVIDIA Geforce Experience Error Code 0X0003
- Fixing Low FPS Problems for a Smoother Rainbow Six Extraction Experience
- How To Get Monster Hunter Rise Running After Update Issues
- In 2024, iPhone Is Disabled? Here Is The Way To Unlock Disabled iPhone XR
- Resolving 'Last Epoch Error' In Your PC: Top Strategies
- Step-by-Step Solution for When Snap Camera Shows No Input Detected
- The Key Role of the Great Leap Forward in History: A Detailed Analysis by YL Computing & YL Software
- The Magnificent Art of Pokemon Go Streaming On Vivo X100 Pro? | Dr.fone
- The Origin Comes Alive | Free Book
- Title: Step-by-Step Guide: Activating Macros on Your Microsoft Excel Spreadsheet
- Author: Christopher
- Created at : 2024-12-10 16:35:55
- Updated at : 2024-12-12 17:06:45
- Link: https://win-blog.techidaily.com/step-by-step-guide-activating-macros-on-your-microsoft-excel-spreadsheet/
- License: This work is licensed under CC BY-NC-SA 4.0.