
Step-by-Step Guide: Unpairing Bluetooth Gadgets From Your PC in Windows 11 & Windows

Step-by-Step Guide: Unpairing Bluetooth Gadgets From Your PC in Windows 11 & Windows
Quick Links
- Remove Bluetooth Devices Using the Settings App
- Remove Bluetooth Devices with Device Manager
- Remove Bluetooth Devices Using Command Prompt
Key Takeaways
- To remove a Bluetooth device on Windows 11, head into Settings > Bluetooth & Devices > Devices. Next to the device, click the three dots and choose “Remove Device.”
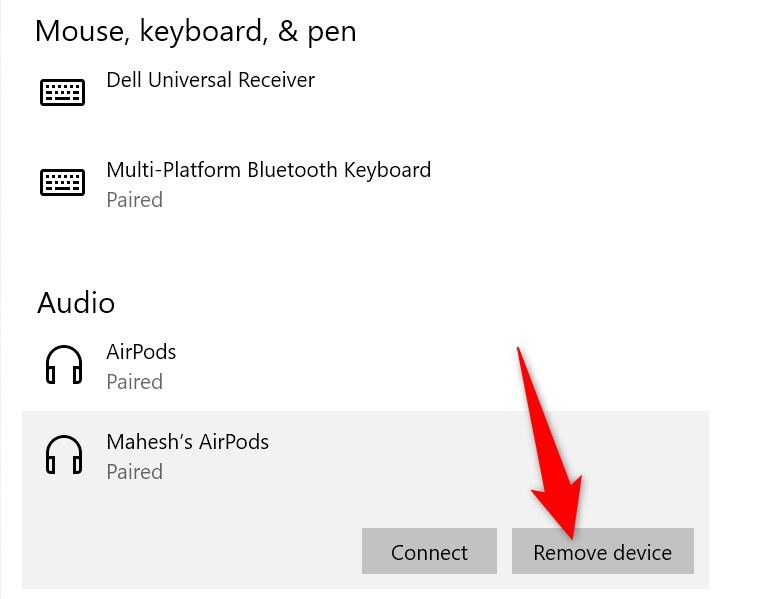
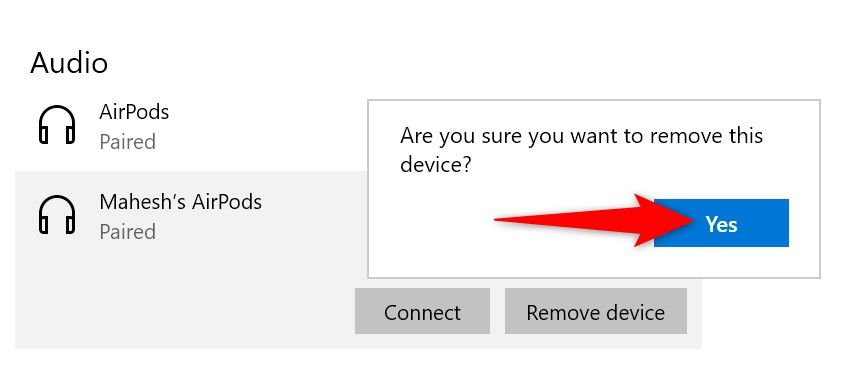
- On Windows 10, navigate to Settings > Devices > Bluetooth & Other Devices. Select the device, click “Remove Device,” and choose “Yes.”
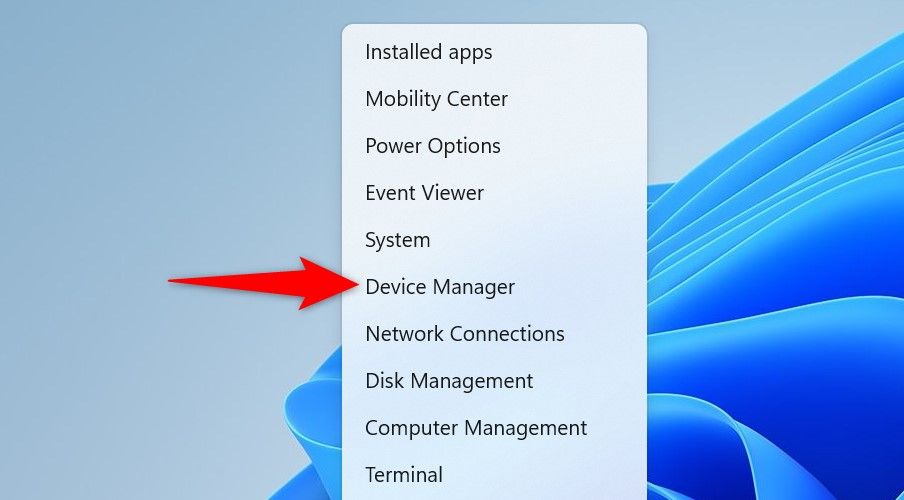
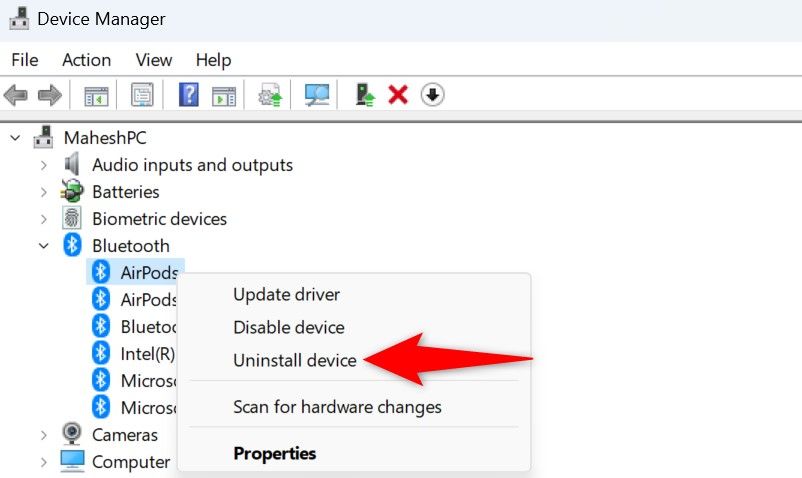
- To delete a Bluetooth device with its drivers, open Device Manager, expand “Bluetooth,” right-click the device, select “Uninstall Device,” and choose “Uninstall.”
If you don’t wish to keep a paired Bluetooth device, it’s easy to remove it using Settings, Device Manager, and Command Prompt. We’ll show you how to use all these methods on your Windows 11 or Windows 10 PC.
Remove Bluetooth Devices Using the Settings App
A quick way to remove paired Bluetooth devices is by using Windows’ Settings app, though it is a little different in Windows 10 and Windows 11.
If your device installed certain drivers, Settings won’t remove them. In this case, use the Device Manager method below. If you’re unsure what method to use, stick to this one.
On Windows 11
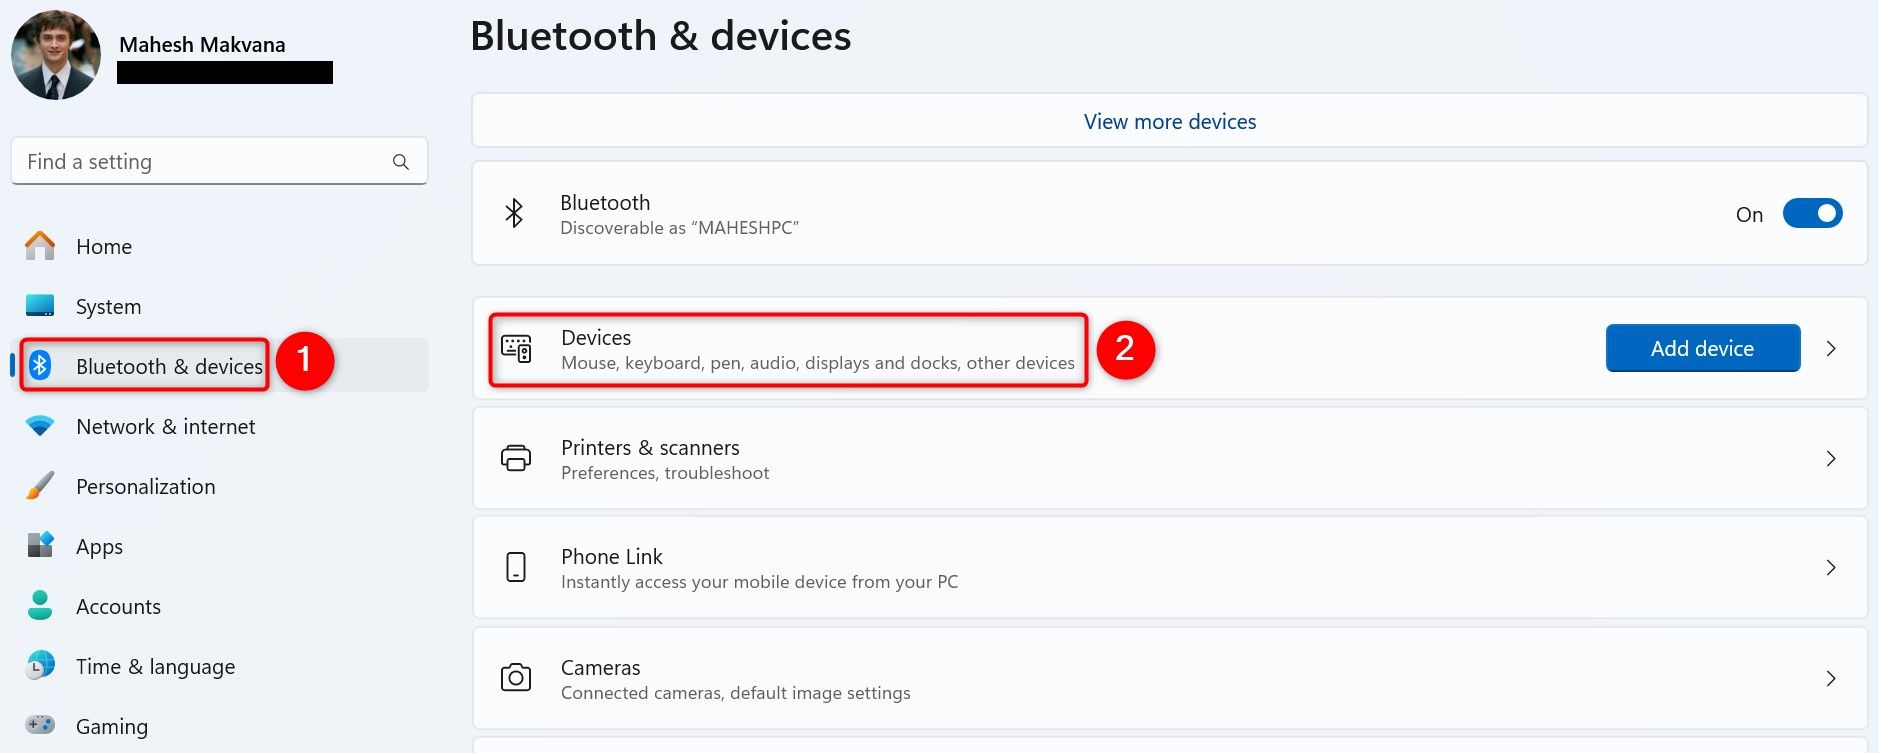
Launch the Settings app by pressing Windows+i. In the left sidebar, select “Bluetooth & Devices.” On the right pane, choose “Devices.”
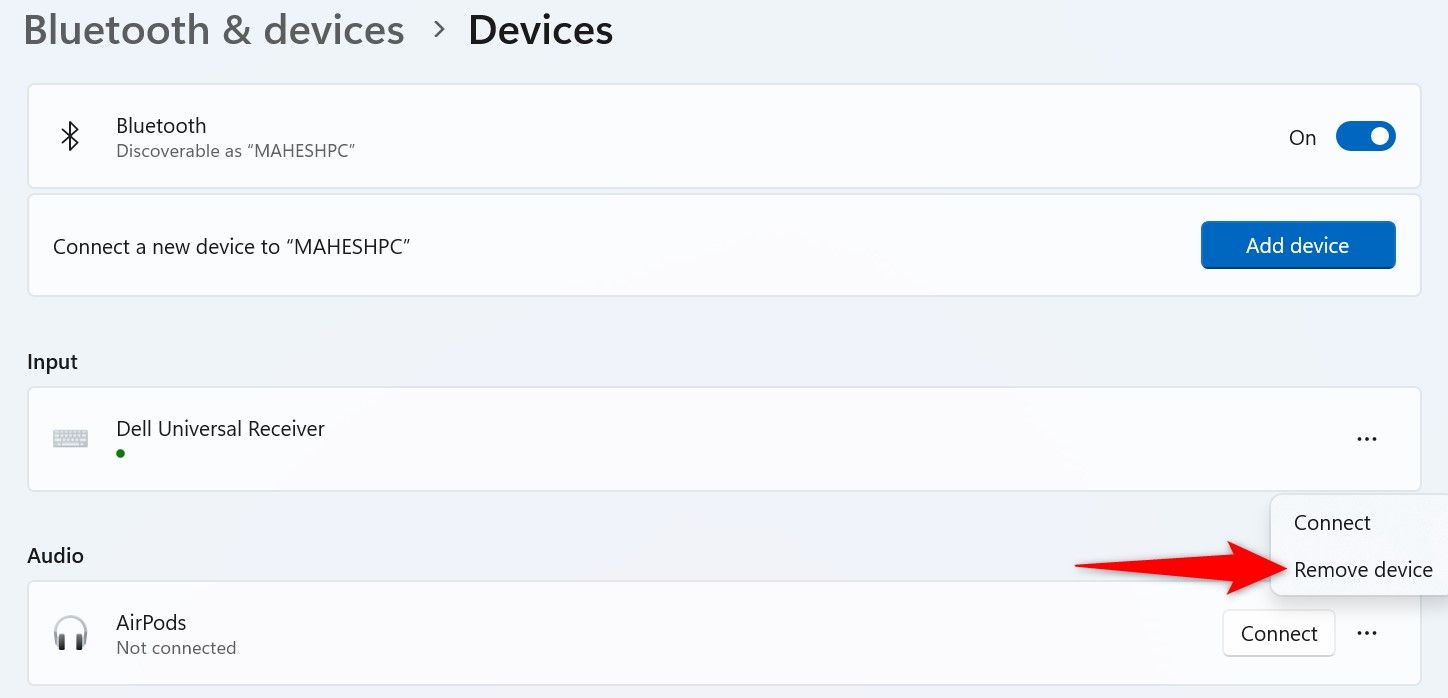
Locate the device you want to remove on the Devices page, then click the three dots next to it and choose “Remove Device.”
Under your device’s name, you’ll see a “Removing Device” message. This message will disappear once Windows has deleted the device.
On Windows 10
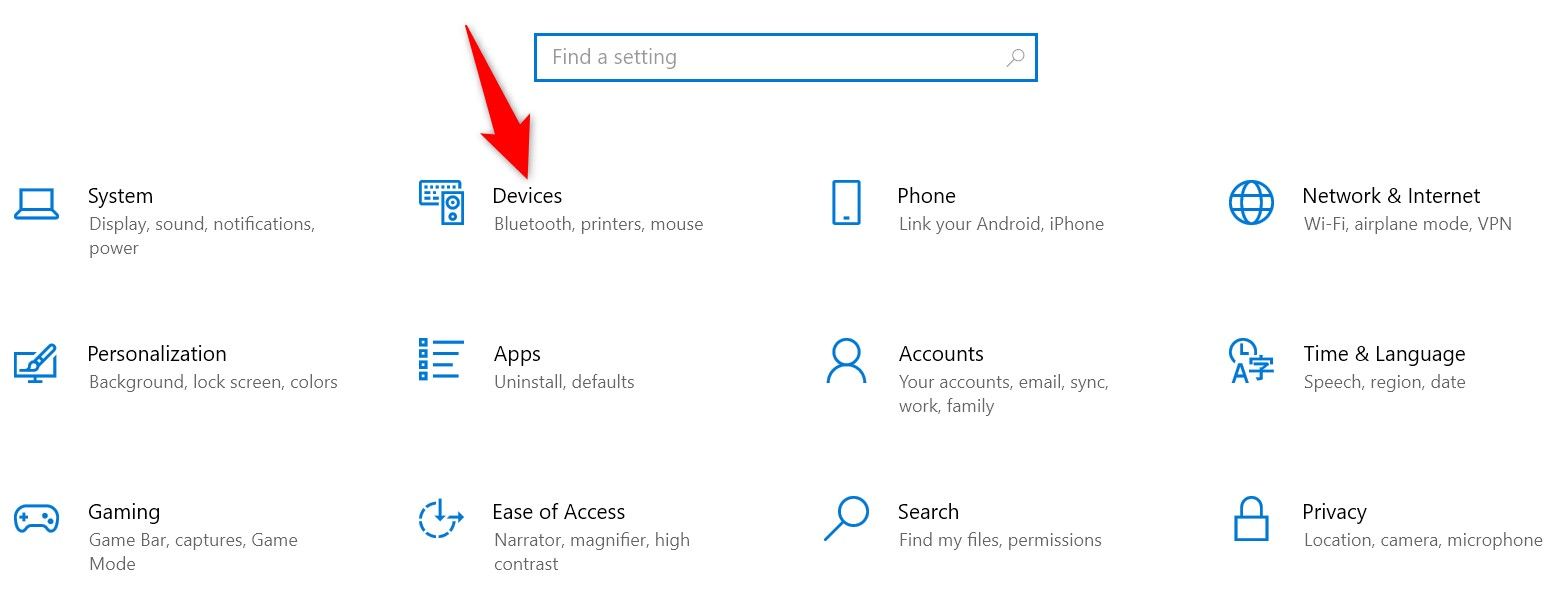
Open Settings by pressing Windows+i. Select “Devices” in Settings.
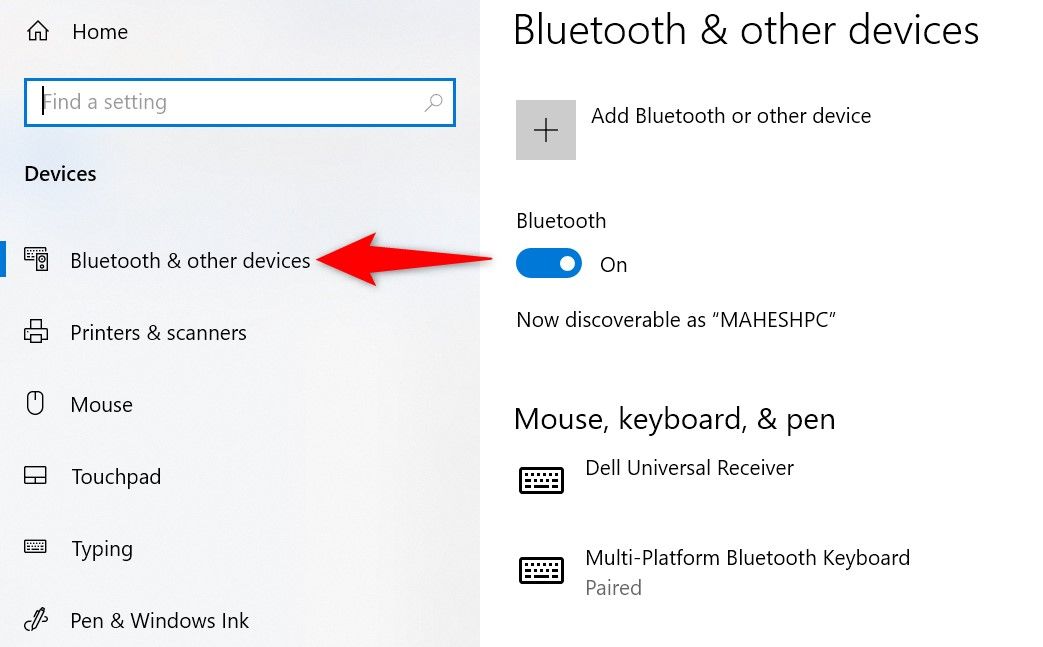
From the left sidebar, choose “Bluetooth & Other Devices.”
On the right pane, find and click the device to remove. Then, choose “Remove Device.”
In the open prompt, select “Yes.”
Remove Bluetooth Devices with Device Manager
If you can’t remove a device from Settings or you want to remove the device and delete its associated drivers, use this method.
Open the Device Manager utility by right-clicking the Start Menu and selecting “Device Manager.”
On the utility window, expand “Bluetooth.” Find the device to remove, right-click it, and select “Uninstall Device.”
In the open prompt, choose “Uninstall.”
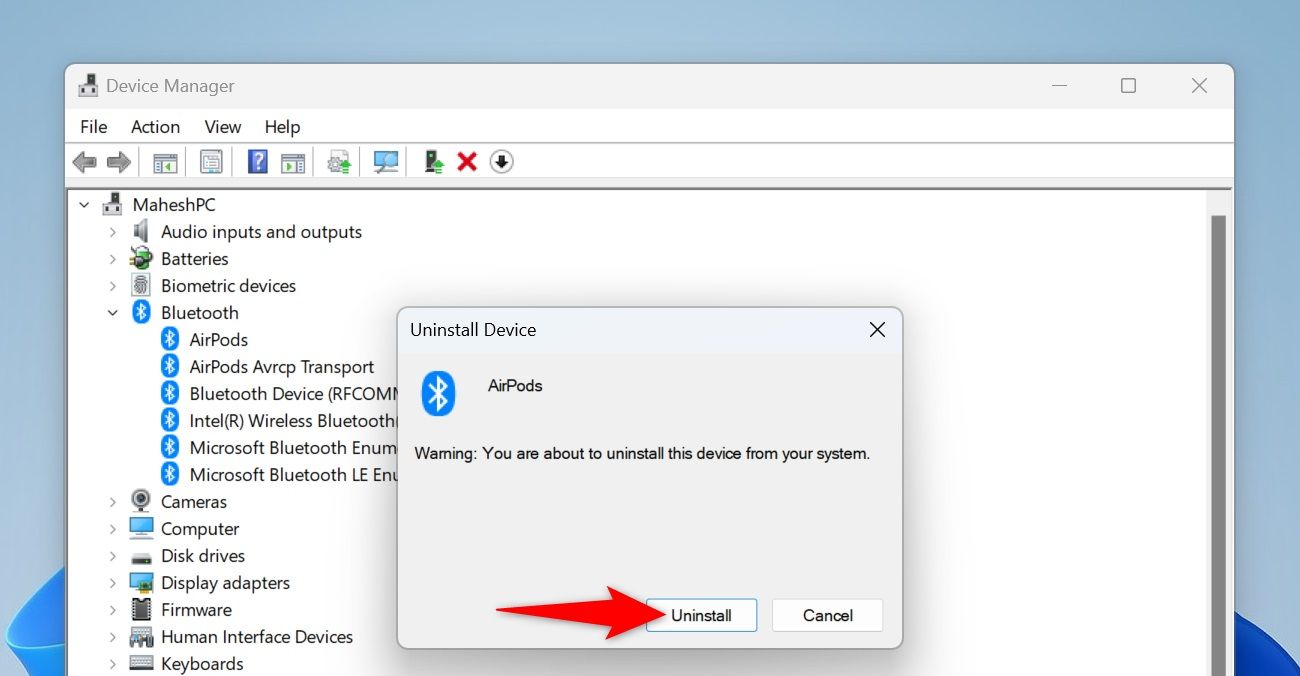
Restart your Windows 11 or Windows 10 PC.
Remove Bluetooth Devices Using Command Prompt
If you prefer using command line methods over graphical ones, you can use a command in Command Prompt (or PowerShell) to remove the paired Bluetooth devices from your PC. This method achieves the same result as the graphical methods above.
To use this method, you’ll first find your device’s instance path. The command that deletes the devices requires this path to identify your device. To find it, open Device Manager by pressing Windows+X and choosing “Device Manager.”
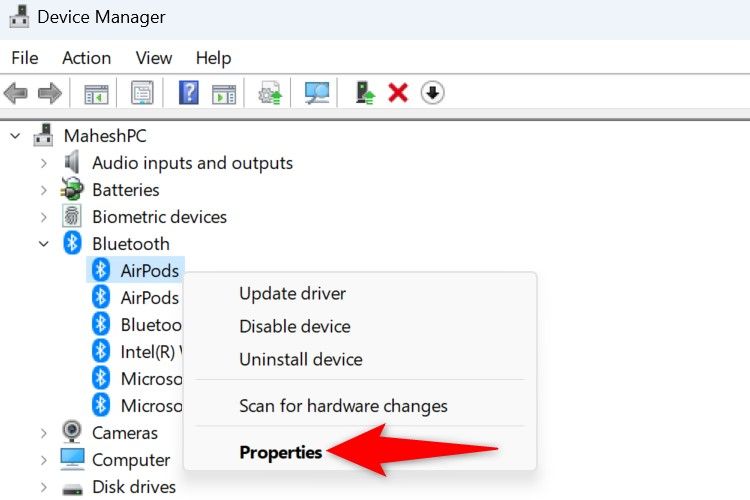
Expand “Bluetooth,” right-click the device you want to delete, and select “Properties.”
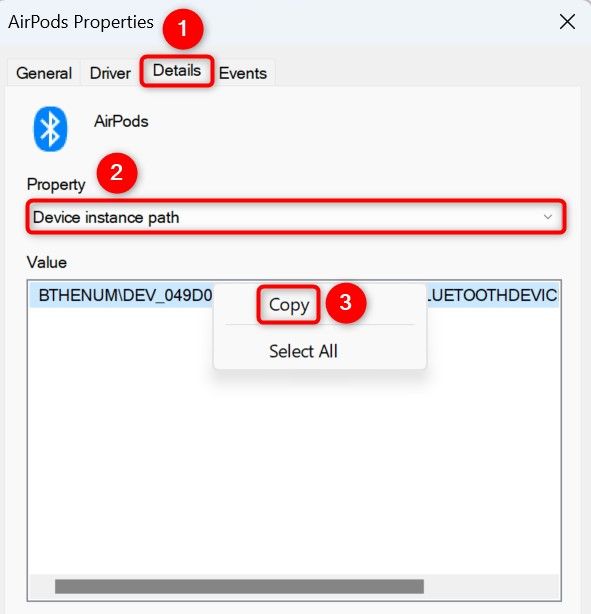
On the Properties window, open the “Details” tab. Click the “Property” drop-down menu and select “Device Instance Path.” This is the second option in the menu.
Right-click the text displayed in the “Value” field and select “Copy.”
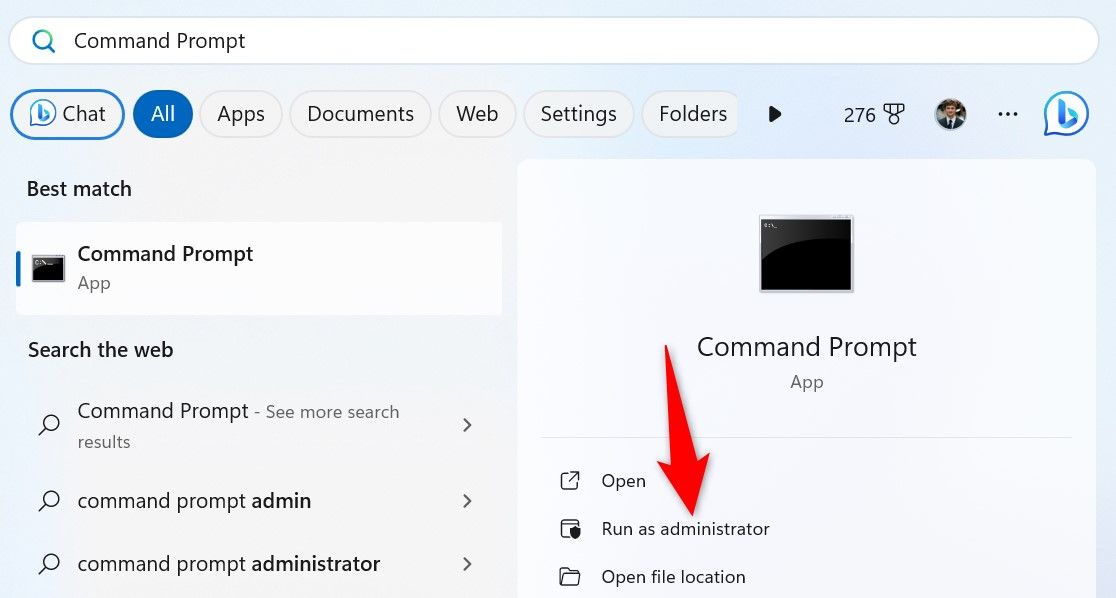
Close Device Manager. Open the Start Menu, search for “Command Prompt”, and select “Run as Administrator.”
In the User Account Control (UAC) prompt, select “Yes.”
On the Command Prompt window, type the following command, replacing “DEVICE_ID” with the value you copied. Enclose the pasted value in double quotes.
Then, press Enter.
Make sure to enter the correct device instance path in the command, or you’ll accidentally end up removing a device you didn’t want to delete.
pnputil /remove-device “DEVICE_ID”

Command Prompt will remove the specified Bluetooth device and display a message. If your device isn’t removed, ensure the entered device instance path is correct.
With multiple methods at your disposal, removing paired Bluetooth devices, even the stubborn ones, is easy on your Windows PC. You can utilize the method you find convenient to use. And in the future, if you wish to use a device again with your PC, simply pair it how you would any device with your machine.
Also read:
- [New] 2024 Approved Core Principles for Online Storytelling Craftsmanship
- 2. Mastering the Technique of Duplicating iPhone Visuals on Apple's Laptop Platform
- Addressing Server Problems to Prevent Cod: Warzone Pacific Crashes
- Boosting Gameplay Performance: Eliminating Low FPS Problems on PC Systems
- DIY Tech Solution: Expanding Your PC's Recognition Capabilities in Windows 11 BIOS
- Enhancing Performance: Fix Lag Issues in Splitgate for Smooth Gaming Experience
- Hearthstone Update Resolves PC Game Crashes - Play Smoothly Now!
- In 2024, Break Free the Chuckles Ranking 20 Hilarious FB Detention Scenes
- In 2024, How to Transfer Data from Motorola Defy 2 to Samsung Phone | Dr.fone
- In 2024, What Does Enter PUK Code Mean And Why Did The Sim Get PUK Blocked On Samsung Galaxy S24 Device
- No More Freezes: Ensure Uninterrupted Play in Your FNAF Adventure on PC
- Primary Screening Footage Study and Off-the-Cuff Selections
- PUBG's New Horizons: Fix Your Installation Woes with This Exclusive 2024 Launch Tutorial
- Title: Step-by-Step Guide: Unpairing Bluetooth Gadgets From Your PC in Windows 11 & Windows
- Author: Christopher
- Created at : 2024-12-08 16:44:49
- Updated at : 2024-12-12 17:20:09
- Link: https://win-blog.techidaily.com/step-by-step-guide-unpairing-bluetooth-gadgets-from-your-pc-in-windows-11-and-windows/
- License: This work is licensed under CC BY-NC-SA 4.0.