Strange Behavior Alert! Rectifying the Issue of a Self-Moving Mouse Pointer

Strange Behavior Alert! Rectifying the Issue of a Self-Moving Mouse Pointer
Quick Links
- Update the Mouse Driver
- Unplug Your Game Controller
- Disable the Touchpad When Using An External Mouse
- Clean the Mouse Sensor and Mouse Pad
- Change the Mouse Pointer Settings
Key Takeaways
- If your mouse cursor is moving on its own, you should make sure its driver is up to date.
- You should also unplug your gaming controller from the computer to avoid it affecting the cursor movement.
- If you’re still having the problem, try some fixes like disabling the touchpad, cleaning the mouse sensor and touchpad, and adjusting the mouse pointer settings.
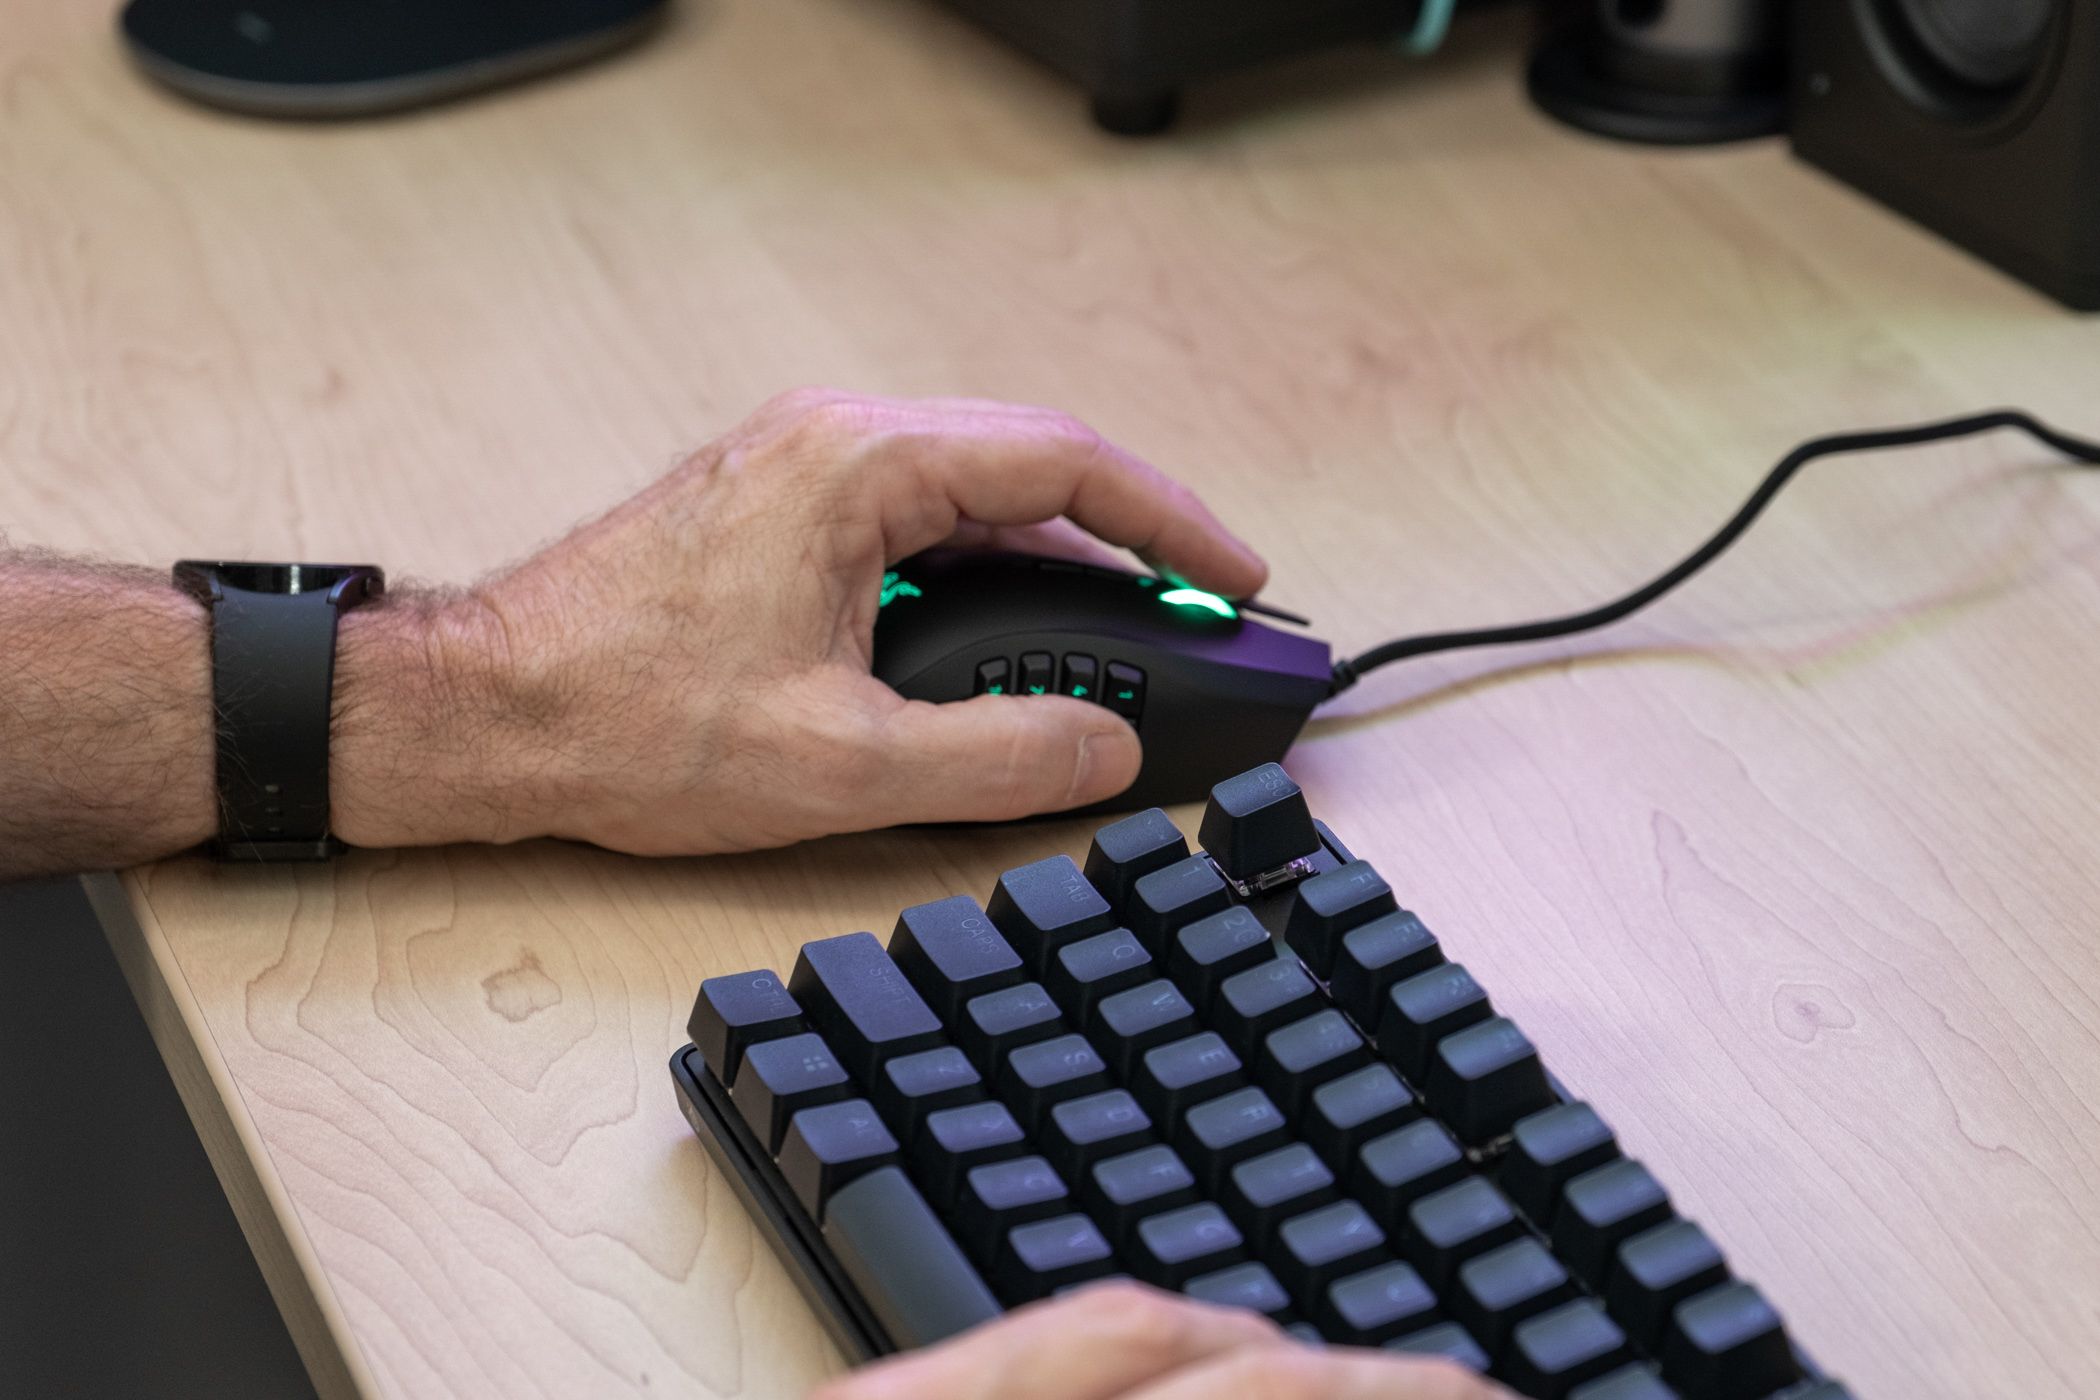
Does your mouse cursor move on its own? Don’t worry, it’s not possessed by a computer ghost! This issue usually happens if you have an outdated mouse driver or a game controller connected to your computer. Luckily, it’s a very common problem, and we’ll show you how to fix it.
Update the Mouse Driver
If your cursor is moving by itself with a new mouse, it’s likely a driver issue. This is especially common with gaming mice . Even if you have this problem with an older mouse, it could be due to outdated drivers.
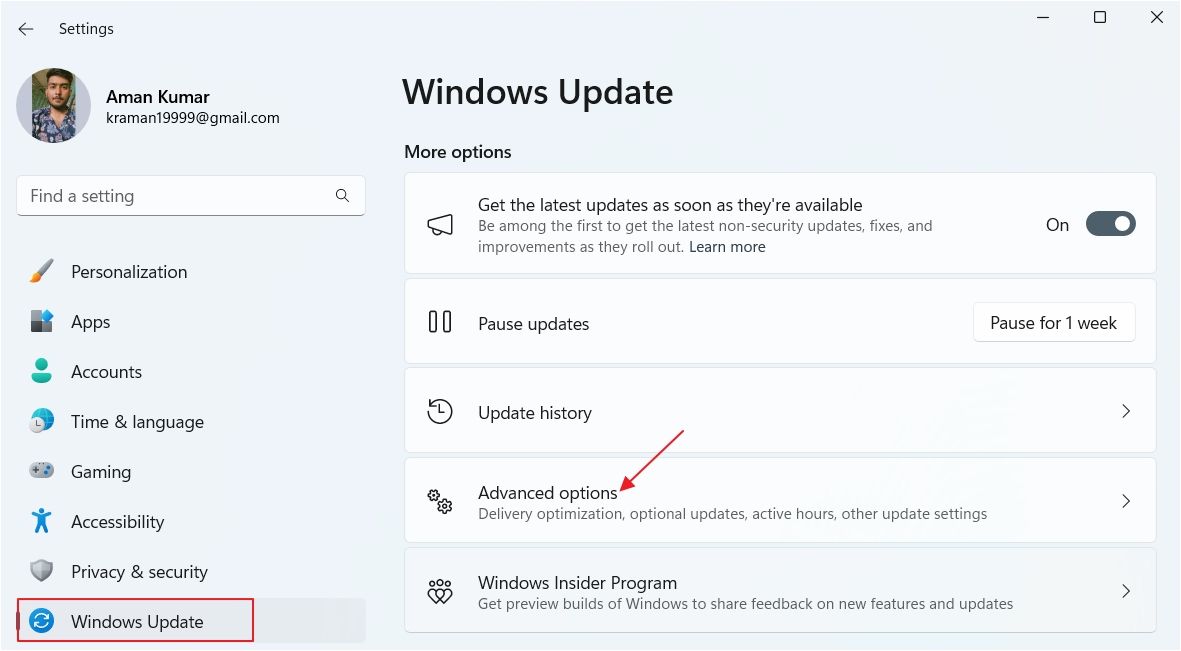
In either case, updating your mouse driver is the best solution. To update your mouse driver, open the Settings app and select “Windows Update” from the left sidebar. Then, click “Advanced options” in the right pane.
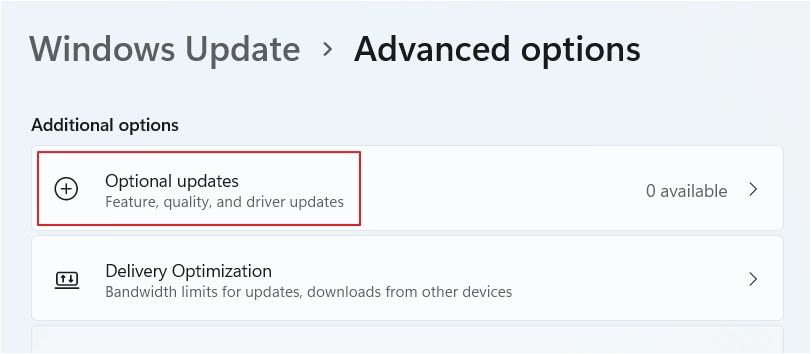
Choose “Optional Updates.”
Check if there are any available updates for your mouse driver. If so, download and install them. Alternatively, you can visit your mouse manufacturer’s website to download any available driver updates. For example, if you’re having an issue with a Razer mouse, visit the Razer mouse driver download page and download the latest update for your specific mouse model.

If the update is in executable format, install it like any other executable file. However, if the update requires manual installation, then open Device Manager and double-click the “Mice and Other Pointing Devices” category.
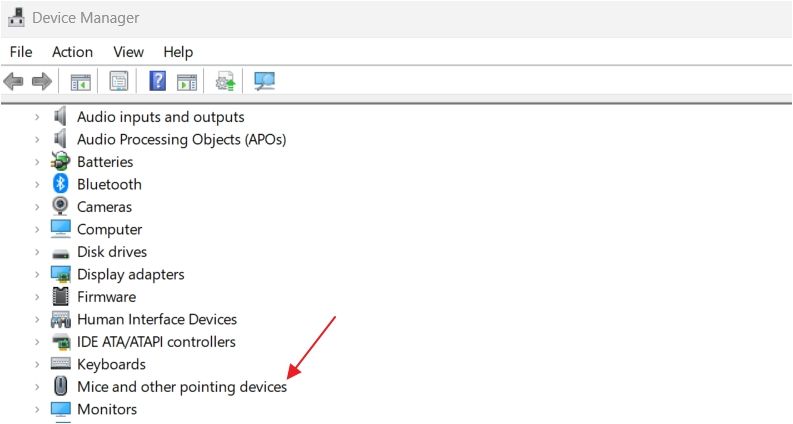
Right-click your mouse and choose “Update Driver.”
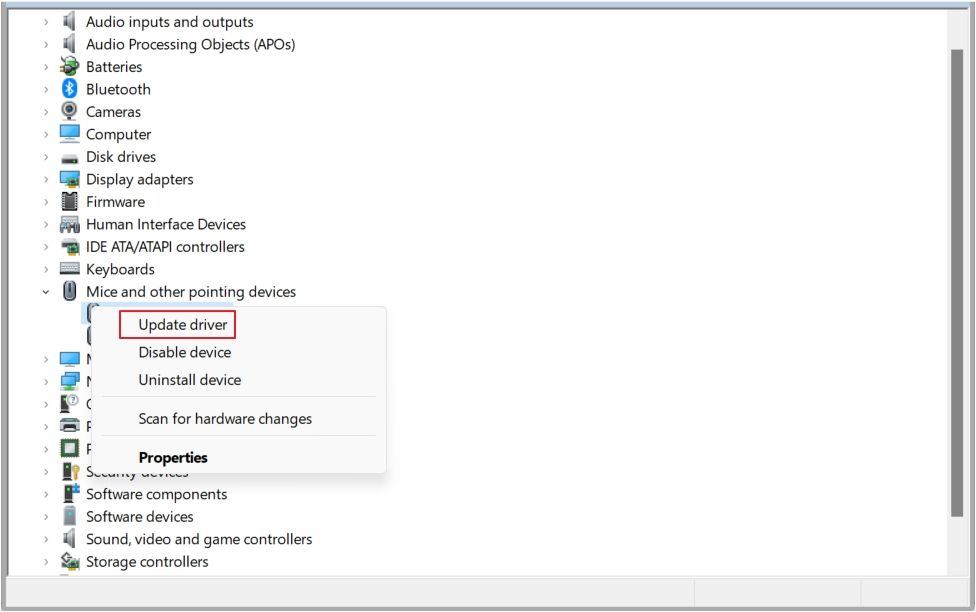
Click “Browse My Computer for Drivers.” Next, go to the location where you downloaded the update, select the file, and then follow the on-screen instructions to complete the mouse driver installation.
Unplug Your Game Controller
This issue can also occur if you have a gaming controller plugged into your computer. That’s because some controllers can control the cursor. So, even if you don’t touch the mouse, you might see the cursor moving around because something is pushing on one of the controller’s sticks, or because of joystick drift .
There are a couple of things you can try in this case. You can either disconnect the gaming controller, or if you have Steam installed, you can disable the Steam input settings for your controller. To do this, open the Start menu, search for “Steam,” and press Enter.

In the Steam client, click “Steam” in the top-left corner and choose “Settings” from the menu that appears.

In the Steam Settings window, select “Controller” from the left sidebar and disable the Steam input settings for your controller. For example, if you have an Xbox controller connected to your computer, you’ll need to turn off the “Enable Steam Input for Xbox Controllers” toggle.
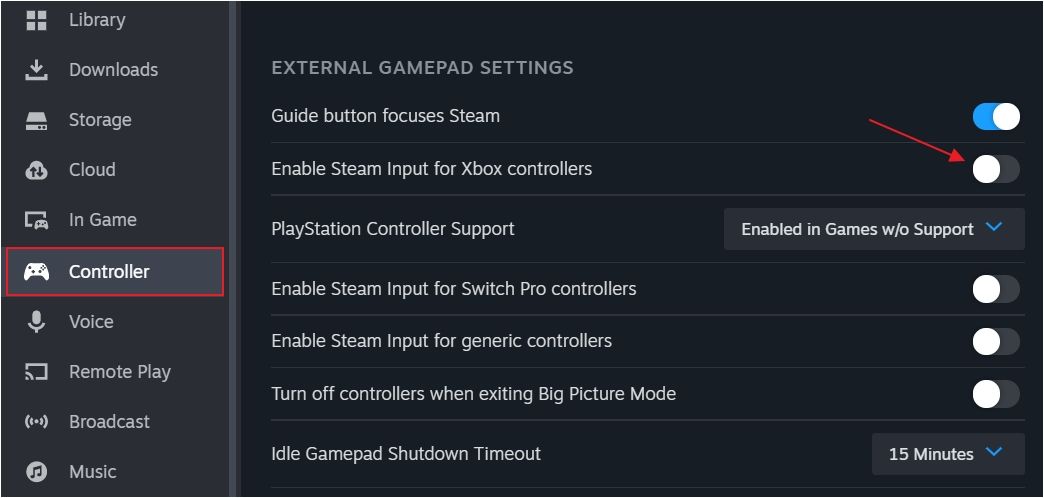
If directly disabling Steam input settings for your controller wasn’t helpful, you’ll need to disable it through the Desktop Layout settings. To do this, open the Steam client and go to Steam > Settings > Controller. Then, under the Non-Game Controller Layouts section, click the “Edit” button next to “Desktop Layout.”

Click the gear icon next to the “Edit Layout” button.
![]()
Select “Disable Steam Input” from the menu and click “Confirm.”
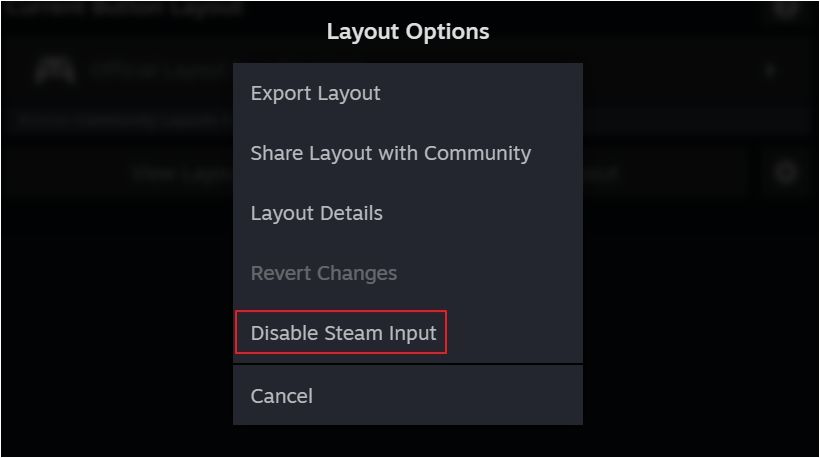
That’s all! You should no longer face the issue if you were experiencing it because of these Steam input settings.
Disable the Touchpad When Using An External Mouse
To disable the touchpad on your Windows laptop, open the Settings app and navigate to Bluetooth & Devices > Touchpad. Then, turn off the “Touchpad” toggle.
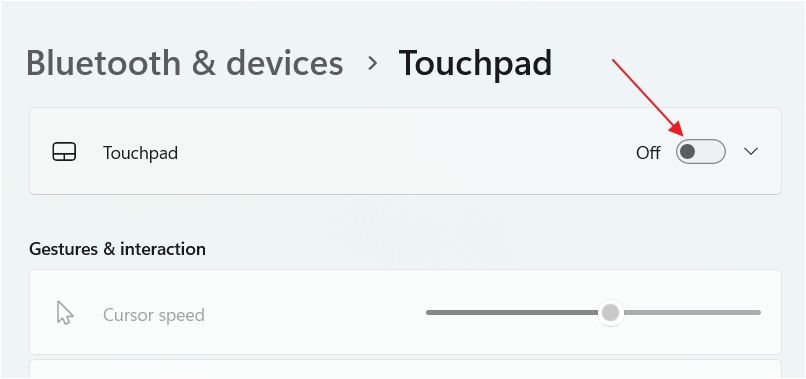
If you’re facing this issue on a Windows laptop where you have connected an external mouse, then you are probably accidentally touching the touchpad while using the keyboard. If you do not want this to happen, you’ll have to turn off your touchpad . After doing this, your laptop touchpad will not work, and you can only control the cursor movement using your external mouse.
Clean the Mouse Sensor and Mouse Pad
The mouse cursor could start moving on its own because of dirt or debris built up under the mouse sensor. When these dirt particles shift for any reason, like air, the mouse sensor will interpret it as if you are moving the mouse, and you will notice your cursor moving around.
Use a soft microfiber cloth to clean your mouse sensor. If the problem persists, it’s likely that foreign particles are built up on your mousepad. To confirm this, pick up the mouse in your hand and check if the cursor moves around. If not, then dirt particles on your mousepad are causing the issue. You’ll need to clean your mousepad to fix the problem. For this, wipe all the dust particles off your mousepad using a soft microfiber cloth.
Change the Mouse Pointer Settings
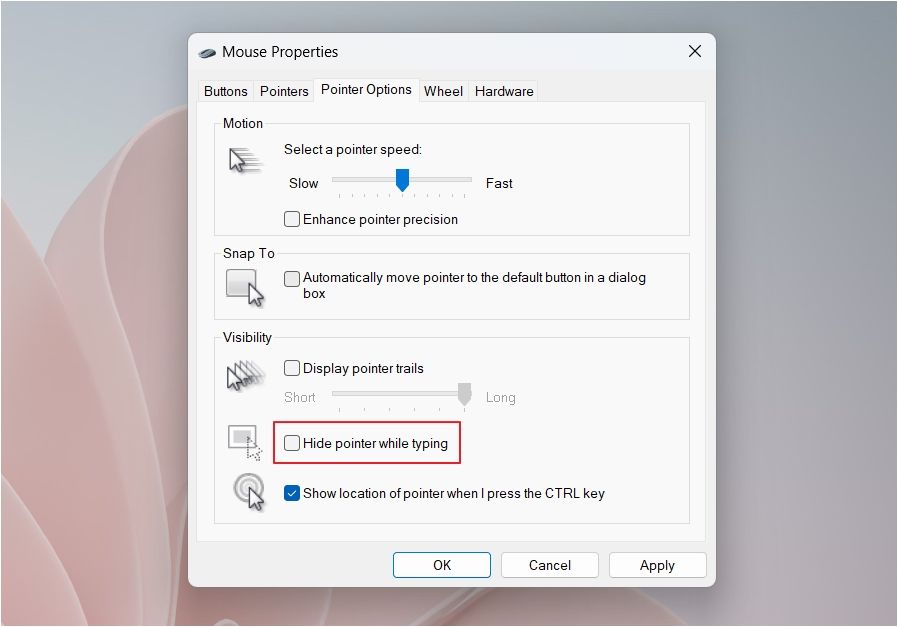
Windows allows you to adjust various mouse pointer settings so you can make the mouse behave the way you prefer. One of these settings is the “Hide Pointer While Typing,” which makes the cursor vanish while you type. However, this feature only works in built-in Windows applications like Notepad and Microsoft Word. With this setting enabled, you might encounter odd cursor behavior in third-party apps, such as your mouse unexpectedly moving around.
If you don’t want your mouse cursor moving around on its own, you’ll need to disable this setting. To do this, open the Settings app and navigate to Bluetooth & Devices > Mouse > Additional Mouse Settings.
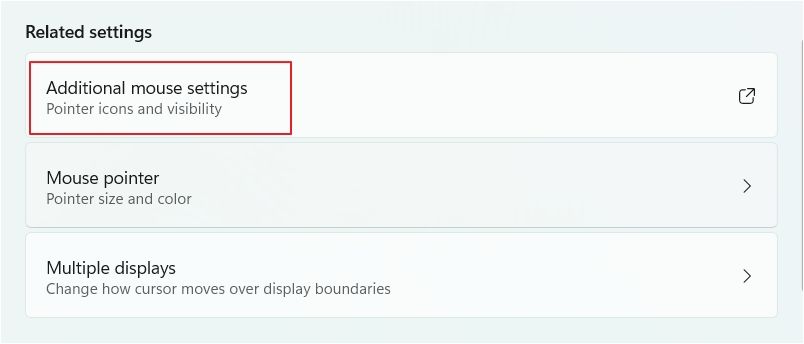
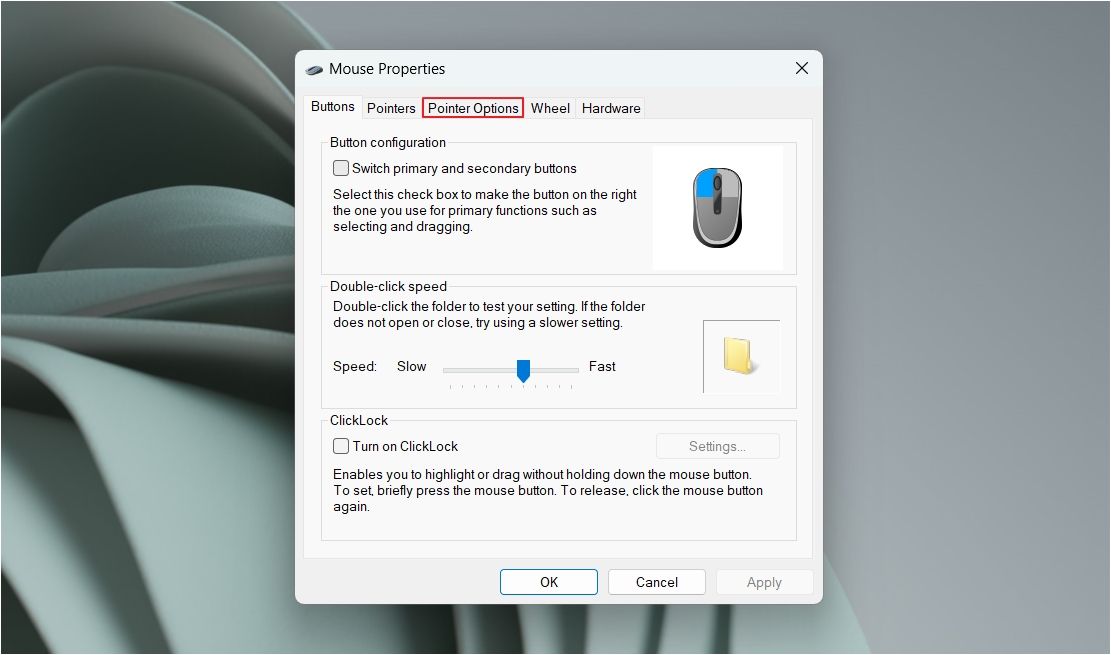
Switch to the “Pointer Options” tab.
Uncheck the “Hide Pointer While Typing” box. Then, click “Apply” and “OK.”
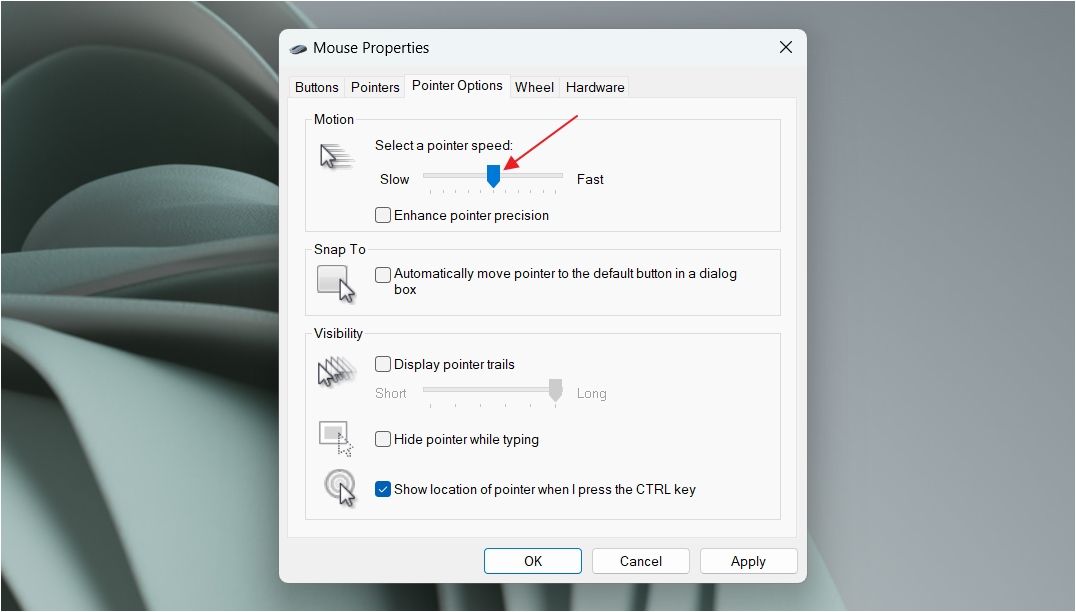
While you’re in the “Pointer Options” tab, you should also check your pointer speed. Make sure the slider isn’t all the way to the right (Fast side). If it is, move it to the center. Then, click “Apply” and “OK” to save the changes.
That’s how to fix your mouse cursor if it’s moving on its own. We hope the problem is fixed now! But if you’re still having issues, you should take your mouse to a repair shop. Alternatively, you can also buy a new mouse for your computer.
Also read:
- [New] Insights Into Profit Allocation on Popular YouTube Shorts
- [Updated] 2024 Approved How to Optimize Your Channels with YouTube’s Featured Spotlight
- [Updated] Flash Forward Quick Youtube Playlists Distribution for 2024
- [Updated] In 2024, Top 10 Must-Knows Before Elevating Systems
- Boost Your Farming Simulator 22 Performance: Solving PC Frame Rate Problems
- In 2024, Best Ways on How to Unlock/Bypass/Swipe/Remove Honor X9a Fingerprint Lock
- Mastering Drones Key Parts for Peak Performance
- Navigating New World's Latest Issues: Fixing Hitches in Gameplay & Connectivity
- Optimizing Performance and Fixing Crashes in 'RoboCop: The Future Noir' For PC Players
- Record Perfectly with Apple's Webcam on MacBook for 2024
- Resolving Common Problems: Get Your Logitech C920 Camera Working Again
- Resolving Stability Issues: A Comprehensive Fix for Diablo Immortal's Persistent Crashes on PC
- Resolving Zoom's Excessive CPU Use: A Guide with Six Key Fixes
- Title: Strange Behavior Alert! Rectifying the Issue of a Self-Moving Mouse Pointer
- Author: Christopher
- Created at : 2024-12-06 17:35:54
- Updated at : 2024-12-12 18:44:54
- Link: https://win-blog.techidaily.com/strange-behavior-alert-rectifying-the-issue-of-a-self-moving-mouse-pointer/
- License: This work is licensed under CC BY-NC-SA 4.0.